And the Nominations are in!

Excited squeal and Blushing! Thank you to the Curious Kiwi for nominating me for a Liebster Award.  I’ve enjoyed reading all about your sewing creations, your move back home to Wellington, and your reviews of pattern magazines too. Oh, and the Pressing Equipment Mission. I’m going to need at least a proper sleeve board for my overcoat sewing plans this autumn/winter.

“The origins of the Liebster Blog Award are somewhat unclear but the general consensus is that it means favourite or dearest to showcase bloggers with fewer than 200 followers.”

And it comes with the following ‘rules’:

1 – Thank your liebster blog award presenter on your blog.
2 – Link back to the blogger who presented the award to you.
3 – Copy/paste the blog award on your blog.
4 – Present the liebster blog award to 5 blogs (with 200 followers or less).
5 – Let them know they have been chosen by leaving a comment.

So, who to pass this onto? It was tough to narrow this down to 5 – let alone find five of my faves who haven’t already been nominated. At that point I decided that receiving an award twice would be just fine… And, 200 followers – too tricky to tell! All of these blogs deserve more than 200 followers :-)

Bouquets of flowers go to:
1. Lizz of A Good Wardrobe for her self drafted top inspiration and her Spring Wardrobe Challenge planning approach – I likes me a good plan!
2. Leah of Struggle Sews a Straight Seam  for her funny adventures and great writing style. Psst  Leah’s running a giveaway of a super blue skirt – grab your measuring tape and see if it will fit!
3. Rachel of MyMessings for totally derailing my budget for fabric shopping in Melbourne by telling me about Sydney Rd and prompting me to get to Rathdowne Fabrics including public transport directions. Photos coming soon.
4. Lee of The Slow Steady for her lovely dresses and peek inside her world in New York – she seems to be falling comfortably into her new habit of blogging very well. Factoid: We both started our blogs in January this year.
5. Paunnet for her beautiful photos of her new creations and inspiration posts. Her recent purple Chloe from Victory Patterns has got my fingers itching to make one.

Thankyou for being part of my sewing world.
Jolly Jalie Jeans

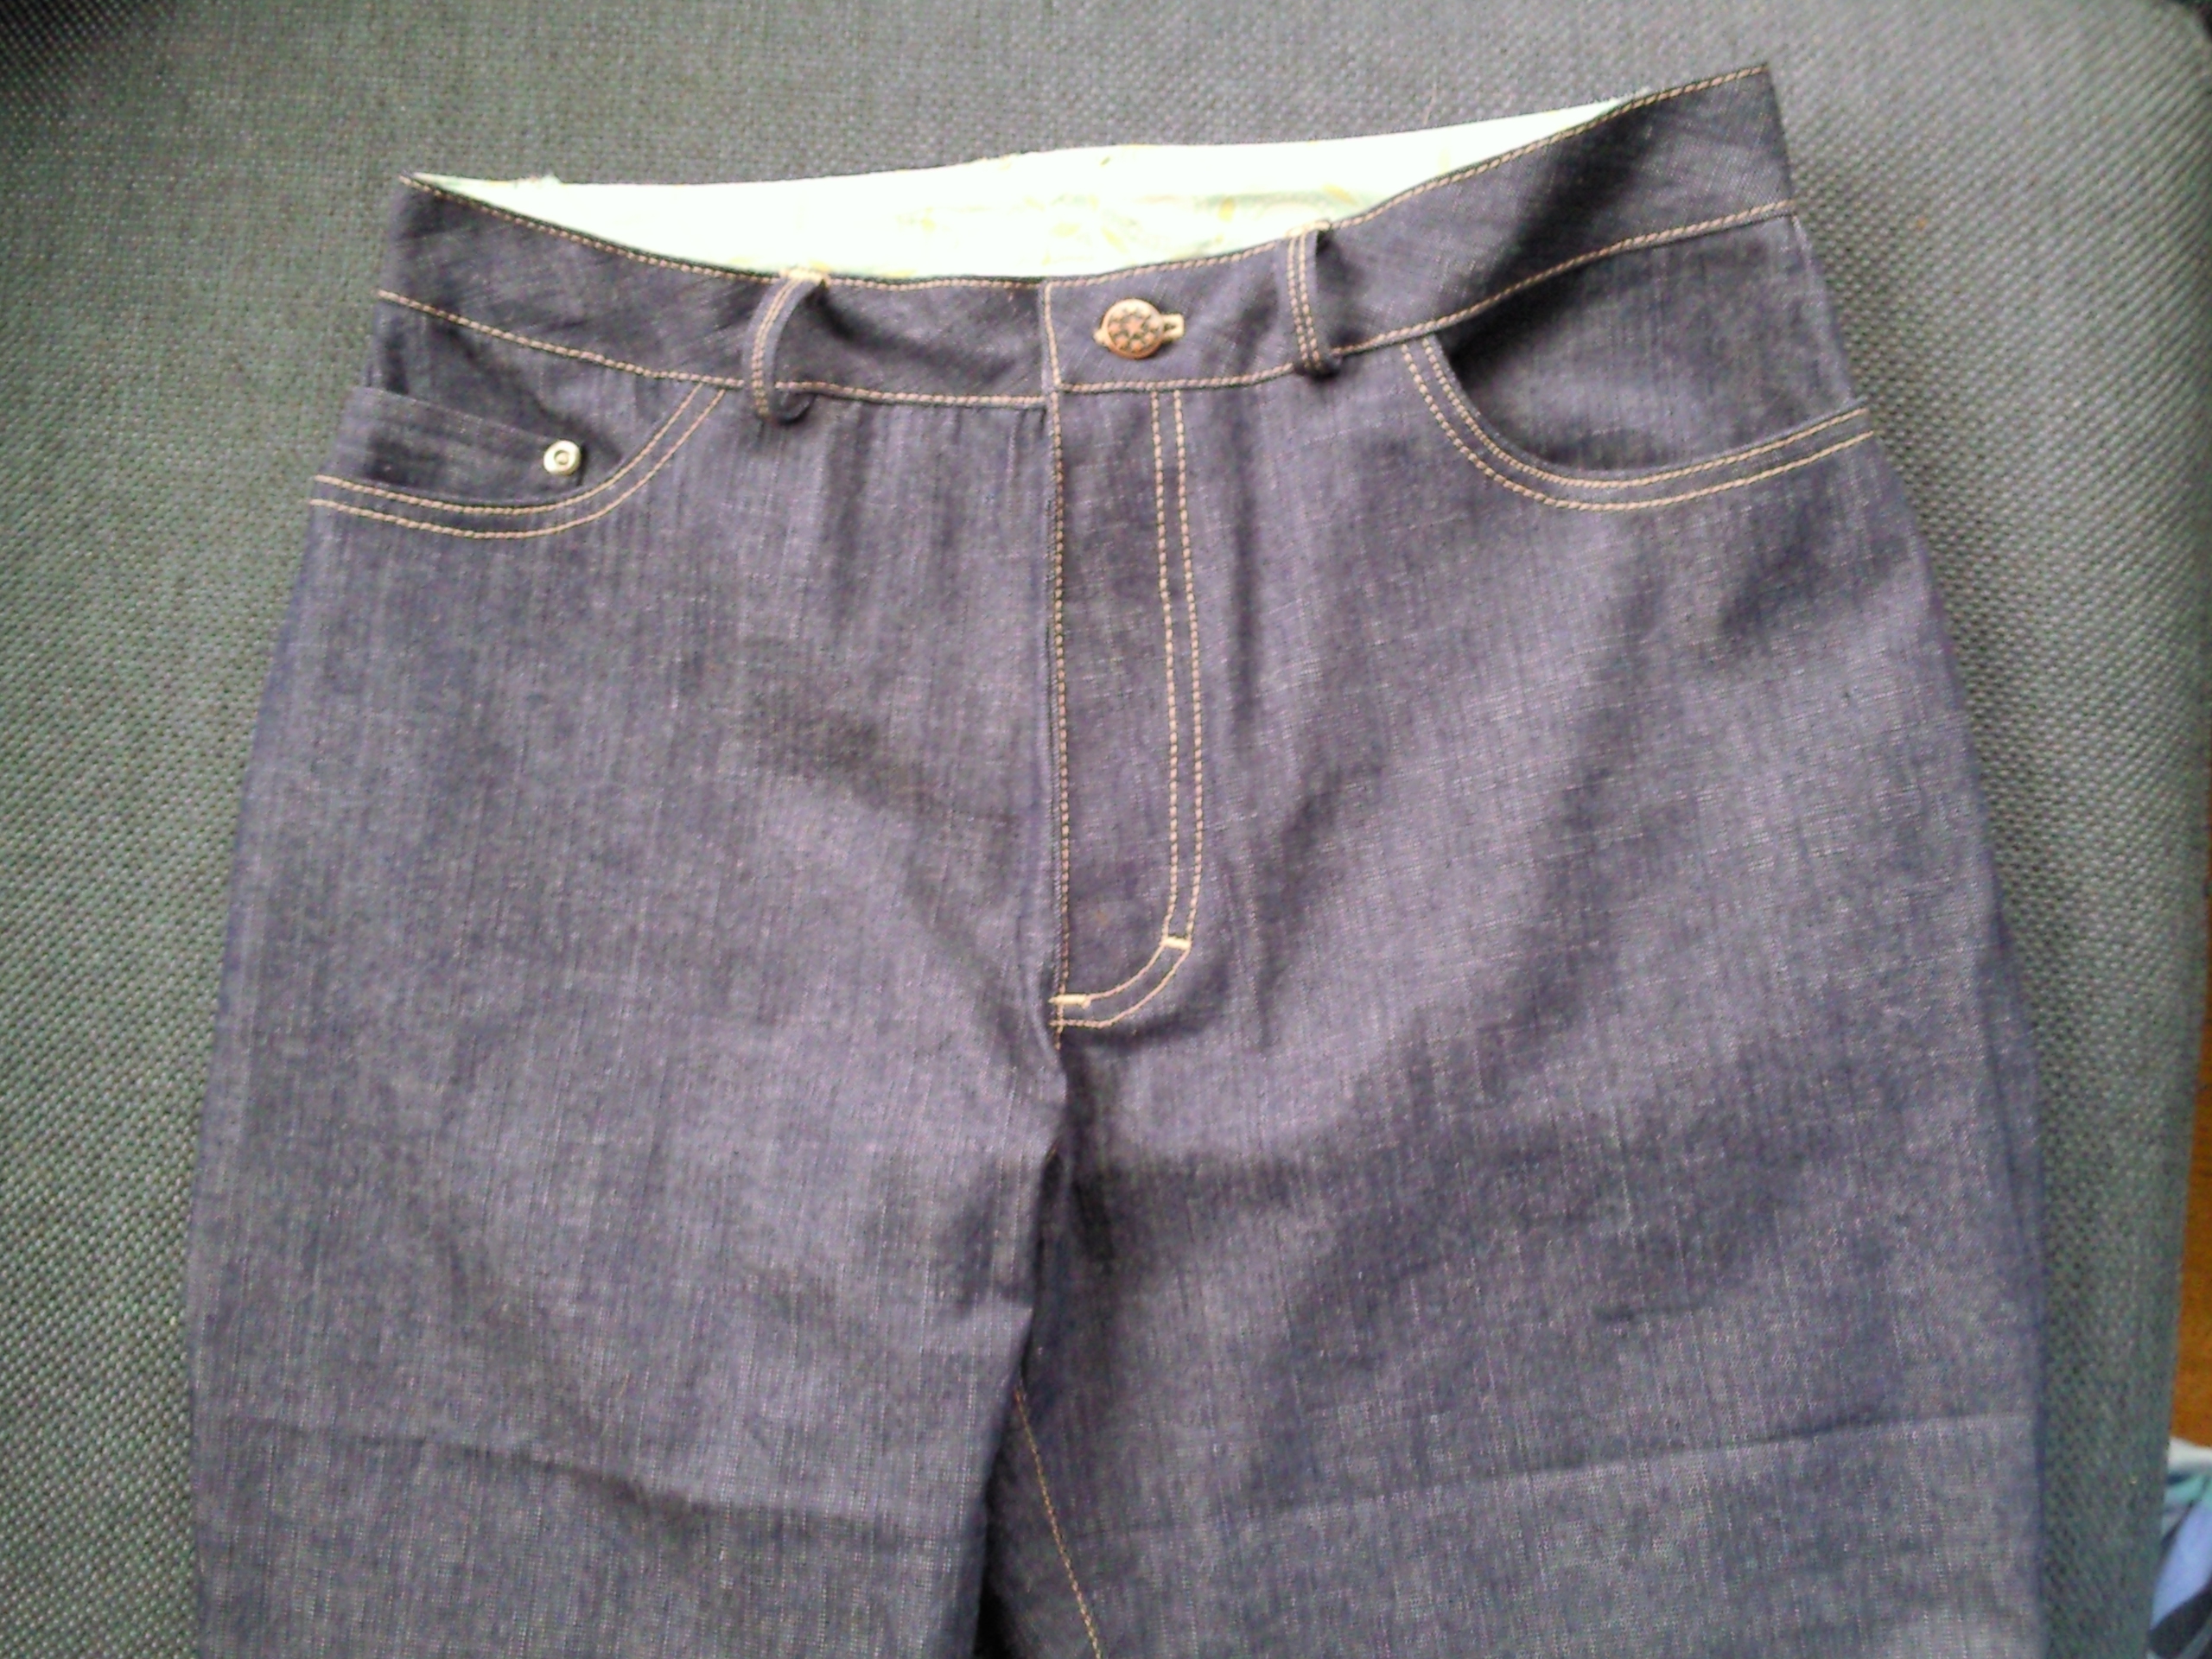
Not sure why I made jeans when I haven’t owned a pair that fit me for several years. Or perhaps the answer is there straight away. These aren’t the most exciting design-wise but for me they are a big shift in thinking about what I can do, and the value of pattern blocks/ basic patterns tweaked to fit.

Finding the write-ups of various patterns on PatternReview together with photos of all sorts of body shapes helped me narrow down the pattern choice to Jalie 2908. I worked with some stretch denim I picked up at The Fabric Store earlier in the year. I had thought of doing a muslin but couldn’t find fabric of a similar weight/stretch for less than I paid for this denim, so cut into the denim with an extra 20mm on all seam allowances on the legs and waist as a precaution.

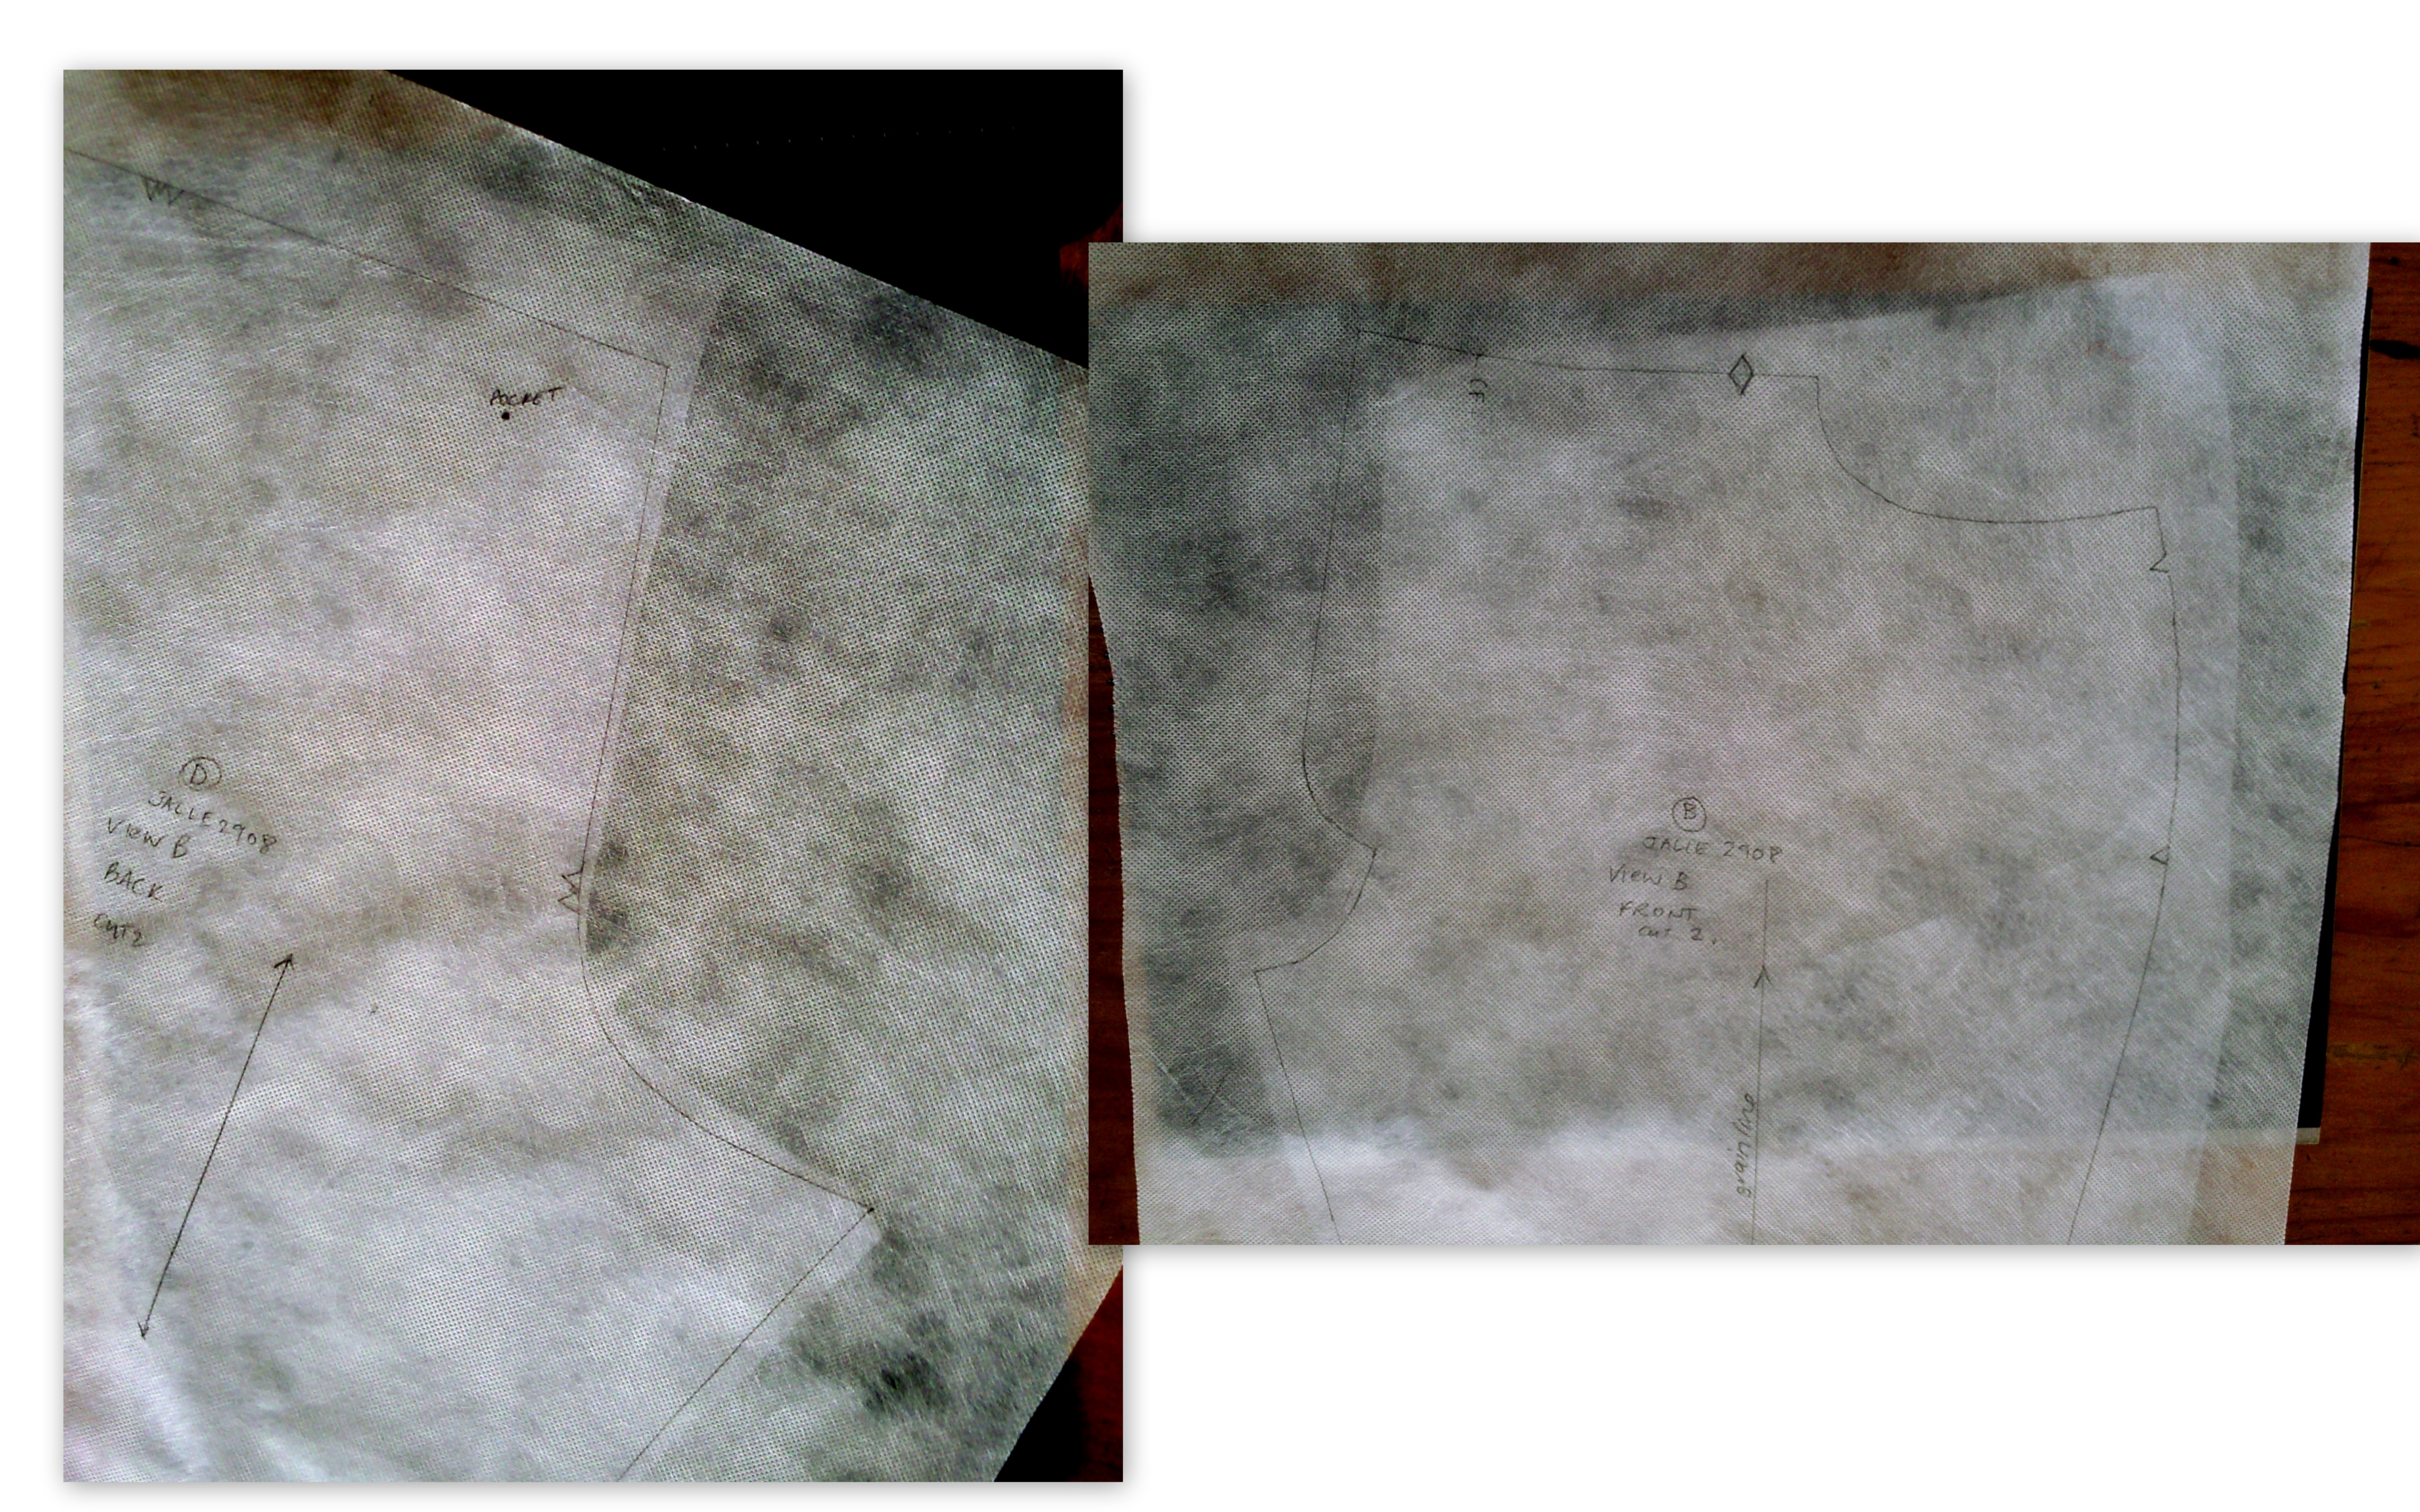
I overlaid the jeans pattern with my adapted Clover trouser pattern to find the curves down to hip line were a near-on perfect match.

(L) Back (R) Front - Jalie 2908 on top (lines), adapted Clovers under

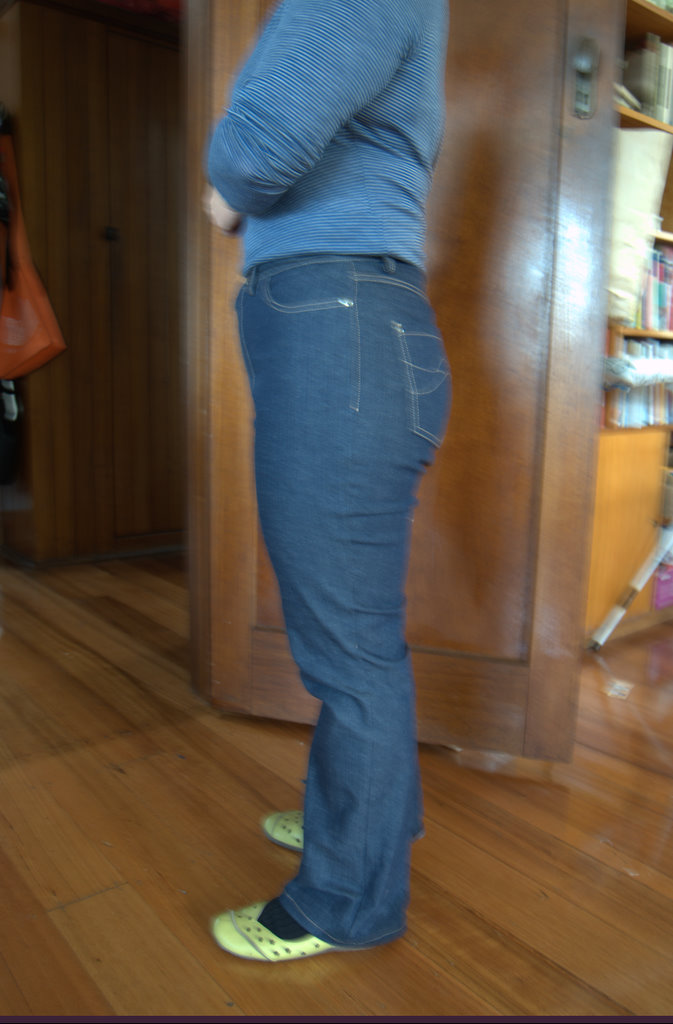
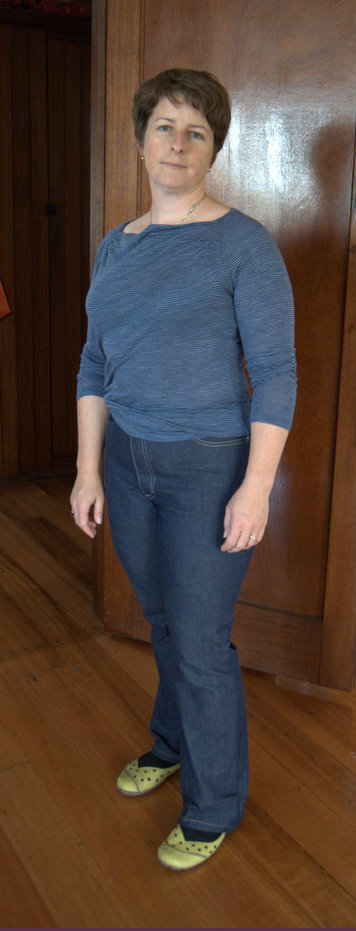
So I cut my fabric and crossed my fingers and ended up with a pair of jeans that fit me well and I am stupidly proud of. I did end up adding a bit more width at Centre Front, and in the thighs but pretty negligible compared to the tweaks I had to do first time around with the Clovers. Putting in the work in October last year paid off this past weekend.

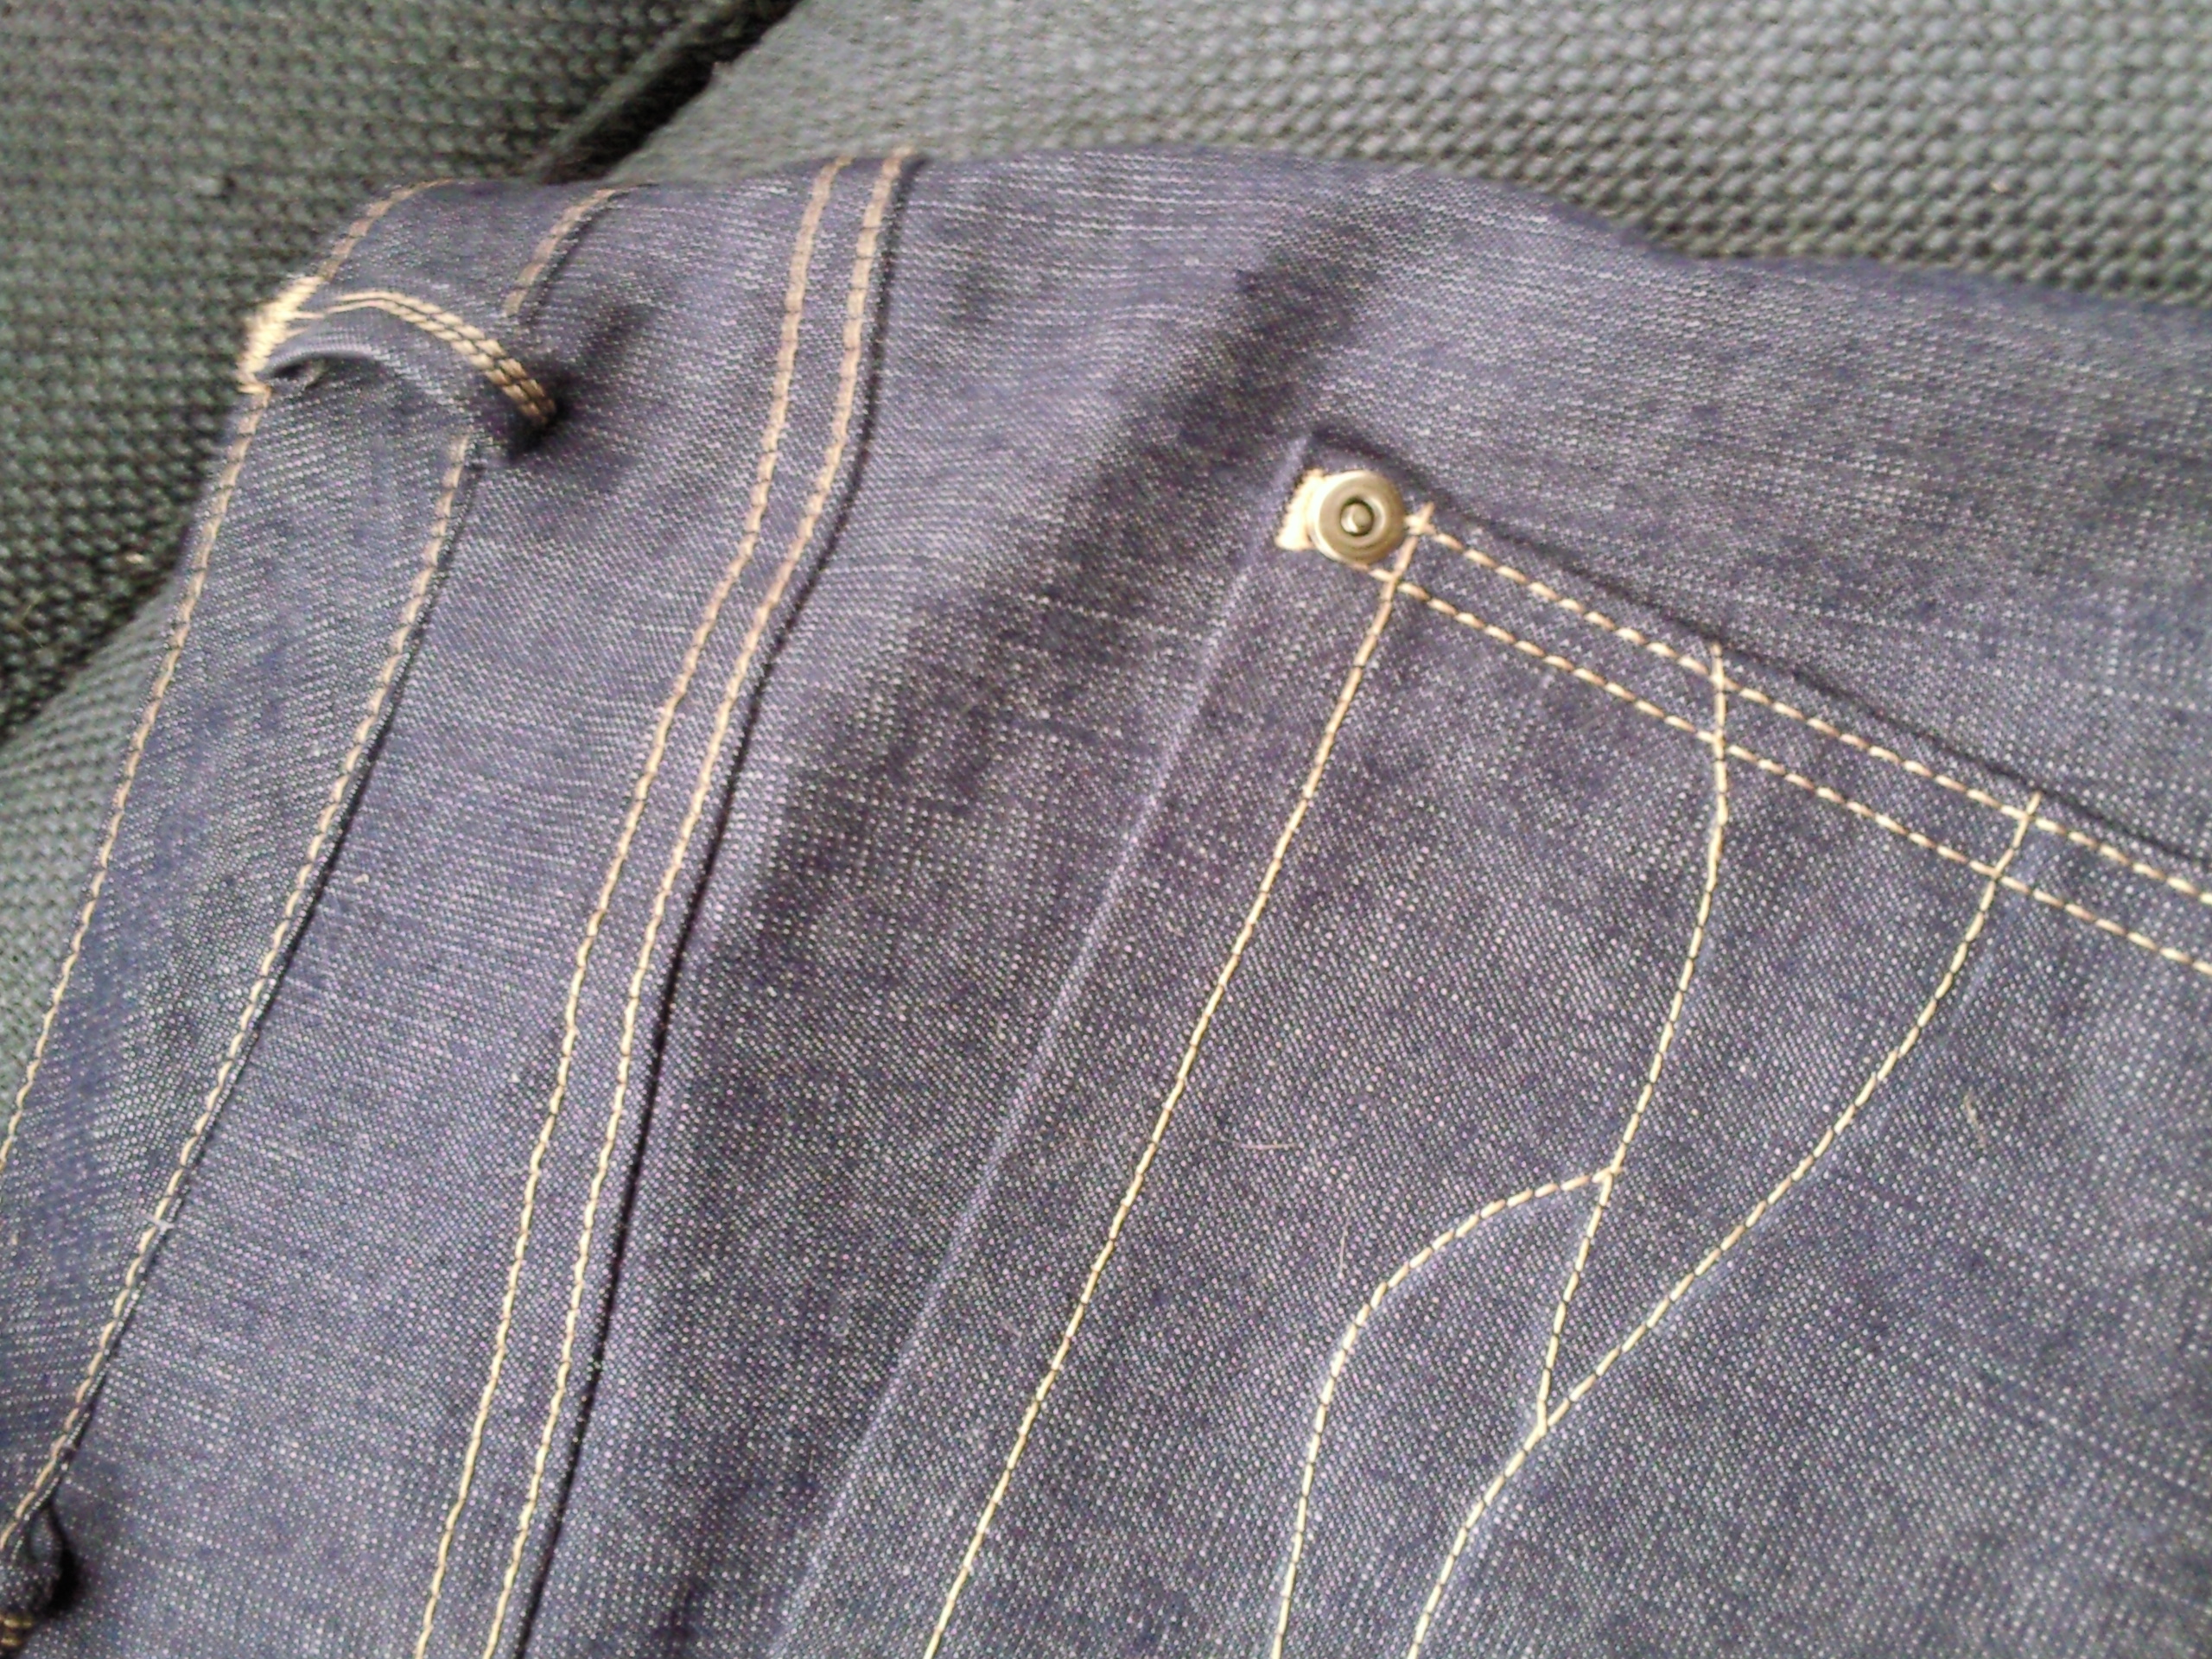
The most fun? Well, besides putting them on and grinning? Hammering in the rivets. It was impressive the difference this little feature made. It shifted them to another level of polish I think for a standard yellow topstitched pair. They felt finished when I did the rivets. Thank you to Melissa of FehrTrade for her rivet tips including clipping the height of the nail part.

There is a bit of excess fabric at the back of the knee/lower thigh that I am sure could be dealt with.Tips anyone?

But overall, for a first pair of stretch denim jeans I am very pleased. No gaping at the back of the waist, no half metre of fabric to take off the hem, enough fabric to cover my thighs. Make again – sure thing. Also Zac asked if I could buy heavier/ regular denim to make him a pair to his specs. What a compliment from a 19 year old son!

Yeah right, the world needs more pictures like this

I'd run out of charming smiles by this stage

3 hours Kimono Wrap Top

Source: http://3hourspast.com/2012/02/11/kimono-wrap-top-pattern-is-live-and-merino-fabric-giveaway/ 

Time to make: 3 hours from cutting out to taking these photos

As Stephc says: “It’s a heavily adapted version of Advance 7701 from the 50′s.” The pattern actually has two versions – the wrap we’ve all seen Steph’s photos of and also a draped front cardigan version without the ties.

Pros:

Oh so quick to put together! I would say about 40 minutes of the three hours was overlocking and then hemming the neck/front opening/ hem edge. What can I say, an unfinished edge looks unfinished to me. I also stopped for a cup of tea.

I wore this out last night to a show and the high neck and wrap around gave a lovely snuggly feel while also feeling ‘dressed’. I added the optional sleevebands for the same reason – I made a pattern piece for these as I tend to forget to cut them out otherwise.

The centre back seam also got the optional fusible stay tape. The seam in the back visually works really well. Made in bold stripes you’d get a fab chevron effect.

I played around later last night with the tie and decided I also like it tied in the back – I get a nice soft bow and this makes the whole top softer looking. A good move from more to less formal. My husband commented that the fabric choice will also make it move from casual to work wear. I can see a nice slightly shiny grey knit in my future…

Cons:

I did have a bit of trouble with lining up the pattern pieces, some had to be skewed at the edges to make the straight lines straight and the curved lines logically curved. Steph responded superquick to an email I sent in the middle of stickytaping the pattern together and things sped up from there.

Update: Steph has updated the Craftsy pattern since I bought my copy which eliminates the issues I had.

Because I *did* finish the edge of the wrappy tie part, there is less stretch there than in some other people’s makes – but it still gives me enough space to tie around my waist. Next time I might experiment with the rolled hem foot on my overlocker.

Fabric: Spotlight 62%Poly/33%rayon/5%Spandex knit with excellent recovery  and I got it out of 1.5m ($20) of 150cm wide knit. I don’t have many knits in my fabric cupboard other than merino so had a special treat of Spotlight on a Saturday lunchtime.

Notions: Strangely I had the right colour thread already. Strange because it’s not a colour I wear but it was leftovers from my kidswear market stall business 19 years ago.

Pattern: http://www.craftsy.com/pattern/sewing/Clothing/Kimono-Wrap-Top–Draped-Cardigan/4803 made to ‘bracelet length’ which turned out a short 3/4 sleeve on me.

Overall – Definitely make again in some other fabrics. A good wardrobe building pattern that could look good in a range of fabrics. Also with the flexibility in sizing it would make an excellent gift project.

Update: I wore this all day Sunday to do a few batches of preserving and jam making and the comfort-factor was perfect.

Finished Object: Minoru Jacket

We did contemplate using the garden hose to create ‘rain’…


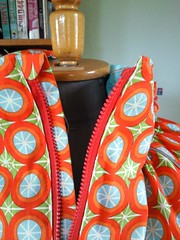
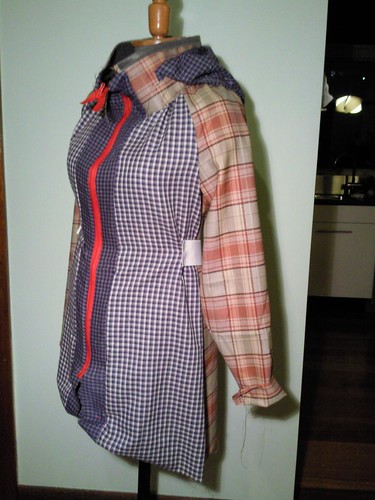
I’m really delighted with how this jacket has turned out. It is as useful and as crazy as I was hoping. The photo showing the reflective piping is the most accurate in colour. Dare I say some of the others look a little washed out? The Minoru pattern is beautifully designed, and I think it is one of the first raglan sleeve garments I have made and liked. I did make a couple of tweaks:

  • I changed where the hood was attached, and followed the suggestion to line it. I also added an elastic drawstring.
  • I added an underlay to the zipper opening.
  • I added reflective piping to the raglan seams. After I’d sewn the sleeve seams I discovered this fabric needed a bit more room for comfortable arm movement so I slashed up the sleeves vertically and inserted an extra 7cm (guided by the fabric). I made it into a ‘design feature’ by running reflective piping in the seam.
  • I added welt + flap pockets to the front. I lengthened one internal pocket to fit my rectangular wallet.
  • And I skipped the elastic cuffs as I wanted a more jackety look. I did have thoughts about buttons and tabs for cinching them in, but decided they were great as a simple turned up hem.

The Fabric

Loud, I think is a good description of the colour and pattern. The first but definitely not the last time I’ve sewn a waterproof fabric for a garment. iPad covers with the coating on the outside are a lot easier! I used seam sealing tape (thanks to Caroline’s guest post on rainwear at Sewaholic.net), learnt about teflon feet and masking tape.

Thanks to Tasia for hosting the Minoru sewalong – it gave me the impetus to get started and make use of my birthday present pattern. Through this pattern and sewalong I am feeling braver about adding my own ideas to a solid base pattern, and also having a great deal of fun documenting the journey. I love the creativity that goes into a project like this. I was inspired by seeing everyone’s finished Minorus when the pattern was first revealed and I am keenly anticipating many more Minorus popping up all over the interwebs soon. I did finish early as the end was in sight and I needed the sewing to keep me sane.

Fabric: Waterproof Riley Blake design cotton, coated ‘PUL’. Source http://nappiescovered.com.au/ Prompt service, realistic colours in their photos and useful information online including how to use seam sealing tape.

Cost: $90 for fabric, $12 for seam sealing tape (+postage), $10 lining fabric, $3 thread, $7 for zips (+airfares as bought on interstate leisure trip), $5 reflective tape (+ airfares as bought extra length interstate on a work trip!).  $15? teflon foot, Pattern – birthday present from my dear husband – priceless :-)

So not cheap, but truely one of a kind. Early in December I saw some unlined waterproof trench coats imported from The Netherlands for about $180, so it is comparable. I don’t think I really should count two lots of interstate airfares, although it does highlight that the only thing bought locally for this jacket was the thread and lining. Everything pretty much was mail order or bought while interstate. Are you hearing me Spotlight?

Hours: not sure…

Pattern: Sewaholic Minoru

Make again? Most likely in a cotton unbrushed fleecy without a hood as a snuggly comfy jacket.


Okay, next project – something from leftover fabric and quick to sew


Minoru: Nearly done

Over the weekend I made and inserted the lining and completed the zipper packets. Tuesday night I topstitched around the collar and down the front. I also pinned up the hem ready for pressing before sewing it in place.

I’m now nearly done. This morning before work I topstitched the hem into place.

This morning I woke up before even the cats thought it was a reasonable time to be awake. I call it ‘stupid o’clock’.

I caught up with my regular reading including sewing blogs and was tickled pink to see Tasia had highlighted my welt pocket addition to the Minoru [insert excited squeal here] I’ve been very proud of those pockets, now even more so. Although I would strongly recommend inserting them on the front pieces before you sew anything else. I did it after doing sleeve and side seams which meant a bit of faffing about getting the rest of the jacket out of the way while sewing. All credit to Sherry’s wonderful welt pocket tutorial at pattern-scissors-cloth.

Another tweak I have done is add an underlay to the zipper in deference to my plans to potentially wear this while bike riding; if the rain is hitting my front, the non-waterproof zipper is a weak point. Finding a waterproof zipper or waterproofing one was off the cards. Adding the placket underlay would probably be overkill for a regular fabric jacket though.

Zip underlay

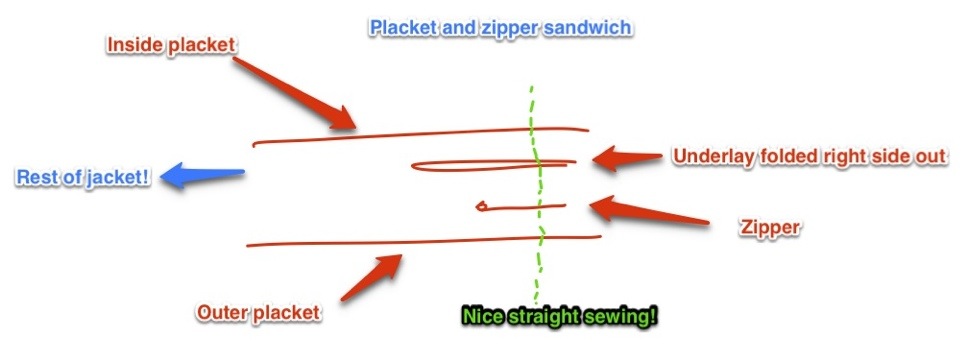
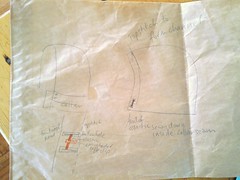
I cut a fifth placket out of the main fabric, folded it in half and made a little rounded end to it for folding over the top of the zip. Blatantly copied from my son’s rain jackets again. It will also stop the zipper getting caught in clothing underneath which is something that seems to happen quite a bit to me. I’ve discovered it also makes a nice little tab of fabric to hold onto while pulling up the zipper to start with. To attach it, I sandwiched the zipper between the underlay and packets, having finished both ends of the underlay already. It should be roughly an inch longer than the placket to allow for the turnover.

My first attempt at a useful sewing diagram

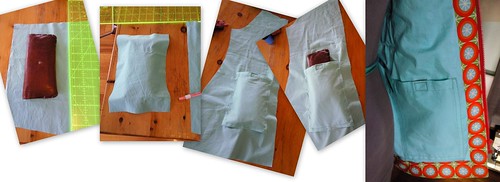
I also made one of the internal pockets longer so my wallet would fit in there. The key step here is putting your wallet on the fabric and drawing around it.

Internal Wallet Pocket

click for larger original


What’s left? The sleeves adaption I have planned.

This has been one of the beauties of Tasia’s pattern – it allows you to really make it your own if you want to. I’m thinking I’ll need one in a simple fleece for early morning gym trips… That’ll be a nice simple one.

Best Foot Forward

One of the best sewing things I’ve done recently was buy a few more specific feet for my sewing machine.

Teflon Foot from gonesewing.com

To get through the Minoru Jacket sewalong using my coated fabric without going insane, the Teflon foot is making a world of difference. When reading some information a while ago about using coated/ waterproof fabrics I’d come across the teflon feet. Sounded interesting but I didn’t order at the time. I did order the foot once I had selected my fabric – but had to wait until the second Monday of the sewalong for it to arrive.

Before the magic foot…
After a quick sample sew of my coated fabric without any special non-stick feet I wondered if I’d bitten off more than I could chew. The fabric bunched up under the foot and made a godawful mess. Deep breath and walk away for a few days. Tried not to sulk. I cut out the lining fabric instead as a diversion. I also made my own reflective piping out of some tape.

Then I remembered reading something about putting masking tape on the underside of the normal foot and gave that a shot – much better but still not perfect. I had to guide the fabric in and out at the back to stop occasional puckering and misbehavior. But it was good enough to get started and sew the shoulder seams including with their reflective piping. Too many four letter words though still. And it seemed to take about 4 times as long as it should have. I am glad the seams will be hidden by lining as some had to be restitched in places where I have wonky lines. Looks great on the outside :-)

When my teflon foot arrived and I tried it – bliss! pretty much like sewing regular fabric with a bit more attention to starting off. Phew. Since then sewing my jacket got a lot easier.


I also picked up a stitch in the ditch or edgestitching foot. Combined with putting the needle into the far left position, it makes topstitching accurately so easy.

Stitch in the ditch foot from gonesewing.com

Pocket details

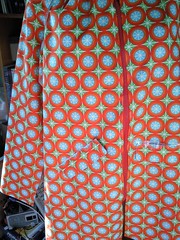
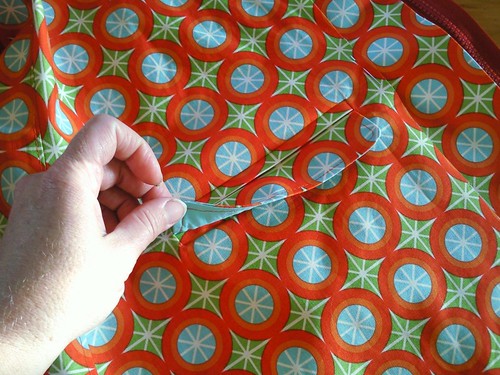
I added a welt pocket with a flap to the front of my Minoru Jacket. I figured if I am making A-line skirts and dresses with added pockets, I definitely needed external pockets on my jacket. Pockets I think are essential in a jacket. Yesterday I put welt pockets with flaps into my jacket front before I sewed the side and sleeve seams. I wanted to have pockets that would not interfere with the side seams and still be fairly water-resistant.

Originally I had planned an angled pocket as that is more comfortable for putting my hands in and leaving them there. But it just looked funny with the patterned fabric. I made the flaps and stuck them on with sticky tape before making the final decision. Rocket the dressform has been really useful for these type of things.

Do I want Straight or Angled Pockets?

Do I want Straight (R) or Angled (L) Pockets?

To decide on the size I looked at two things. The width of the front at the height I wanted the pocket and also some other jacket pockets.

I also found this fabulous tutorial on Pattern Scissors Cloth – so I won’t go into technical details as I followed Sherry’s instructions step by step.

Minoru Pockets
Finished dimensions were

  • Welt/ Pocket flap width – 14cm
  • Welt height – 1cm
  • Pocket flap height – 5.5cm with little curved corners, with 3.5cm exposed.
  • total pocket depth from top of back piece to bottom including seam allowances 17cm
Minoru Pockets

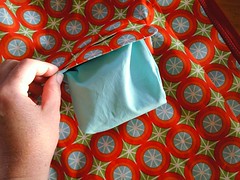
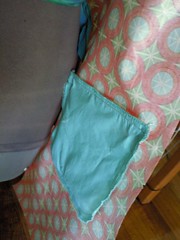
Pocket bag pulled to the outside

Pocket Launch
Pattern pieces therefore:

  • Welt/ Pocket flap width – 16cm
  • Welt height – 4cm
  • Pocket flap height – 7.5cm with little curved corners.

If you want to copy: Pocket flap and bag: Minoru welt pocket pattern pieces (A4 size)

Note – I used Sherry’s recommendation to make the underside piece of the pocket flap slightly smaller in width. Although it turned out I should have interfaced both layers or paid more attention when sewing as both fabrics had some stretch so it all came out much of a muchness. A more stable fabric would not have had this problem.

If you want to copy: Pocket flap and bag: minoru pocket pattern pieces (A4 size). You can see the pocket flap pattern was originally too small. Luckily I had decided to make these as the first step before doing the rest of the pocket.

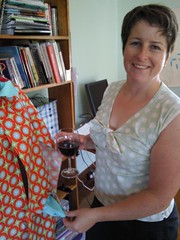
Once they were finished it was time for a nice glass of wine and a “Pocket Launch” and dinner.
Seam Sealing Tape

I also discovered that the fabric I made my muslin out of was probably not stiff enough to give me the information that the seam from collar to armpit was not really long enough. I sewed and topstitched my side/sleeve seams and popped it on and thought eeek! The sleeves were also a bit snug. So I nervously cut a neat vertical line about 2 cm from the seam between back and sleeve and have added a vertical rectangle from the collar edge to the cuff, and made it into a ‘feature’ by adding reflective piping on the upper seam. This has given me more movement in the arms. Damn those ‘strong’ biceps :-) Most of the time I wouldn’t be wearing a jumper under this jacket anyhow so it will still be very wearable.

Hoodwinked

When I sewed together my muslin I sewed the bottom edge of the hood to the sewing line marked for the zip. This meant it was too tall. However it was probably the right size in the beginning, because according to the hood/collar instructions (which I read only this morning, ahem!), it is meant to be attached at the bottom edge of the collar. In my research (staring intently at other jackets in the house), hoods seem to be attached just below the zipper line. Also Rachel had written about a bit of water creeping in via the hood/collar area due to a ‘lip’ when the zip is open.

Anyhow… Changes I wanted to make were doing a lining and adding a drawstring.

When in doubt, make a plan – figuring out order of steps.
Hood Changes

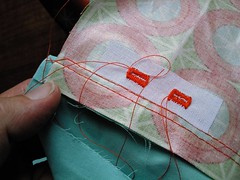
I added an elastic drawstring with little tension clips for horrid weather.Detail of making the drawstring holes.
Hood Changes

Upclose of the mini buttonholes – about 6mm/ 1/4 inch long. I added a small bit of interfacing on the wrong side to be safe.
Hood Changes

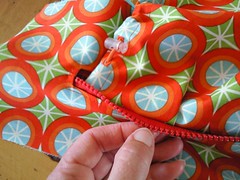
Attaching the hood near the zip. I basted the bottom edge of the hood to the bottom edge of the zipper, then attached the zipper to the collar.

Hood Changes

Pleats – to accommodate the width of the hood inside the zip I added two small pleats either side of the front edge which I think look quite nice.

Hood Changes

Testing the hood for size.

Hood Changes

You know, it probably would have been easier to read the instructions when I was putting together the muslin, but I am happy with the end result, and happier with the way the hood is attached inside than the original. If I was a perfectionist I would sew some binding over the overlocked edge of the hood. I can always add that later.

The Mishmash Minoru Muslin

Erm, so I’m not planning on making this a ‘wearable muslin’ going by the mishmash of fabric I gathered together. It’s just being described as neo-punk by my husband. I think he’s too polite.

Minoru Muslin

Collar -  I interfaced the inside of the collar to simulate the body of the waterproof fabric I will be using and got the comment that it didn’t have to meet Antarctic conditions. 3cm off height, to be taken off top edge, leave hood attachment placement line the same. This way it will not bump my ears!

Waist elastic – 5cm higher for placement line.

Use original pattern length for body pieces but use 5cm hem allowance. Not that I’ve referred back to the pattern yet – this might be the allowance!

Sleeves need to be shortened. Turning them up 5cm without the cuffs will work fine. I am replacing the elastic with a fold and button/ buttonloop arrangement as this give better comfort for me both open and closed.

Shoulders and side seams should be cut a size up (or seam allowances sewn at 10mm rather than 15mm. Just to give a bit more ease for bike riding.

Hood – a slice off along the centre seam of about 7cm at the front edge tapering to nothing by the double notch at the back of the hood. I will also add a drawstring with some cord elastic and a couple of those things that clip onto the cord. Doohickeys, I think they are called.

Under consideration – an underlay for the zip so that it is a bit more water-resistant? This is an idea from looking at other jackets. I’m not aiming for a full bushwalking-in-torrential-rain-waterproofing, but centre front could be a potential hot spot (wet spot? ew!) for leakage when cycling into the rain. I might also pick up a 80cm long zip and try that too as the 70cm is not long enough. A separating zip with two pulls would be most excellent.

I have not yet decided on pockets and placements. I would like external pockets but not sure on whether patch or welt would be better and most useful.

Ok I’m ready to cut out my lovely fabric tomorrow night. For some reason I’ve felt quite nervous about cutting into it. I think it is because I had to order it online rather than knowing I can duck into town and pick up an extra metre if I mess something up majorly. I’ve certainly sewn with more expensive fabric recently (nice Italian men’s shirting anyone?). Also needing to get it right the first time to minimise resewing seams and affecting the waterproofness is an extra layer to the construction process. I’ll be experimenting a little and using seam sealing tape for the first time. I might practice on a drawstring bag for the gym first…

Prepping for the Minoru Sewalong

20120111-212123.jpg

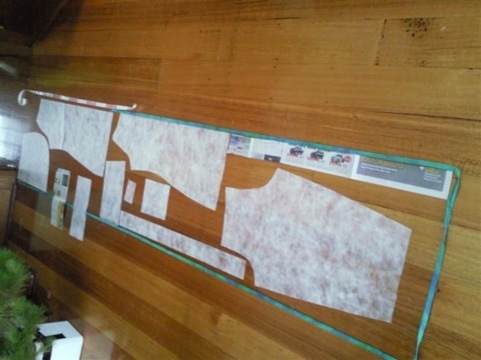
I traced out all the pattern pieces (giving me the option of making another size later if need be) and laid them out to get a sense of the fabric required. At 115cm wide fabric 4 1/4 yards (3.8 metres) seemed an awful lot and the provided cutting layout looked generous. And I’m going to have to shorten sleeves a bit too. The fabric I have chosen is only 106cm wide. Yet my layout gives me a ‘fabric required’ of only 2.8 metres at a size 10. The only piece shown as upside down is the hood, so with an extra 20cm I’ll have enough to turn it up the right way. The pattern repeat of circles is 4.5 cm so shouldn’t be too tough to match. I also have the large sample piece I ordered for smaller things like pockets.

20120111-212233.jpg

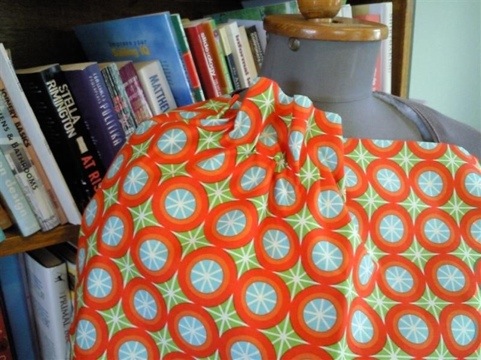
I ordered 3 metres of this lovely creature. It is a waterproof PUL coated on the inside cotton print from Nappies Covered and has a lovely drape for a coated fabric. I had ordered three samples, aka ‘nappy cuts’ to see what the fabric felt like, and to check colours. Well worth the money to know what it was like and how gorgeous and intense the colours are. Of the three, this was the clear stand-out. I did a mock gather by squishing the fabric onto sticky tape on the wrong side and it looks OK. So it should work around the neck and waist gathers.

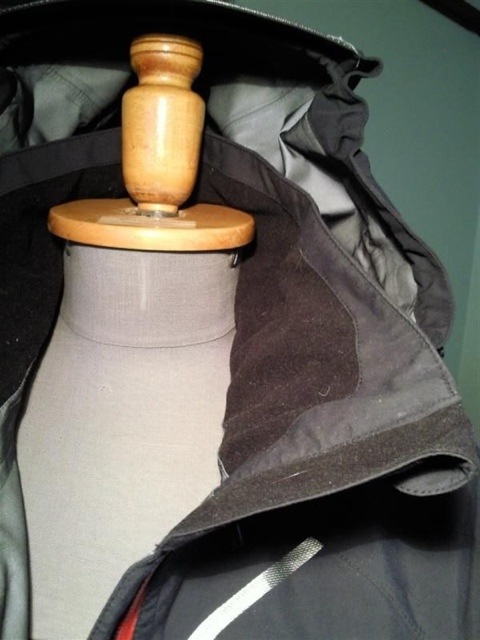
I also spent some time studying my son’s collection of waterproof jackets that he has bought for sailing and walking. The inside of the collar of all of them is cut out of micro/polar fleece fabric which is nice and snuggly around the neck. So I am stealing this design idea. Another design idea was to use the seam sealing tape to coat the outside of zips for pockets on the front. I am not sure about this yet – I might go for a welt pocket with a zip inside that will probably stay open most of the time. Pockets were lined in polar fleece too. The expensive jackets have so many details and features.

20120111-212537.jpg

After reading Rachel’s notes about how her Minoru performed in Melbourne rain, I had a close look at the way the hoods were attached. Seam sealing tape again appears to be the answer, coating the seam between the zip and the lining. I’m going to experiment with this and post as part of my Sewalong updates.