
When I sewed together my muslin I sewed the bottom edge of the hood to the sewing line marked for the zip. This meant it was too tall. However it was probably the right size in the beginning, because according to the hood/collar instructions (which I read only this morning, ahem!), it is meant to be attached at the bottom edge of the collar. In my research (staring intently at other jackets in the house), hoods seem to be attached just below the zipper line. Also Rachel had written about a bit of water creeping in via the hood/collar area due to a ‘lip’ when the zip is open.
Anyhow… Changes I wanted to make were doing a lining and adding a drawstring.
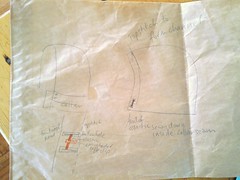
When in doubt, make a plan – figuring out order of steps.
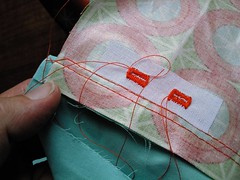
I added an elastic drawstring with little tension clips for horrid weather.Detail of making the drawstring holes.

Upclose of the mini buttonholes – about 6mm/ 1/4 inch long. I added a small bit of interfacing on the wrong side to be safe.
Attaching the hood near the zip. I basted the bottom edge of the hood to the bottom edge of the zipper, then attached the zipper to the collar.
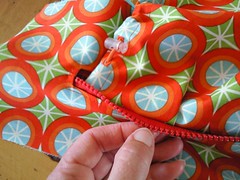
Pleats – to accommodate the width of the hood inside the zip I added two small pleats either side of the front edge which I think look quite nice.

Testing the hood for size.

You know, it probably would have been easier to read the instructions when I was putting together the muslin, but I am happy with the end result, and happier with the way the hood is attached inside than the original. If I was a perfectionist I would sew some binding over the overlocked edge of the hood. I can always add that later.