Weekend with Phyllis

This weekend we spent some time with my husband’s grandmother Phyllis in suburban Melbourne after a week of work in the city.

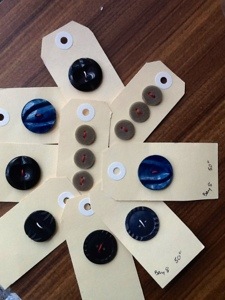
Today we went up to Healesville to visit Tarrawarra Museum of Art and on the way stopped in Yarraglen to have lunch. Amongst the antiques and secondhand stores I found some lovely buttons and pored over some vintage lace. While I was looking, Phyllis kept insisting she had some buttons in a cupboard as well. I carefully chose a few carded buttons that I could see myself using.

20121027-200222.jpg

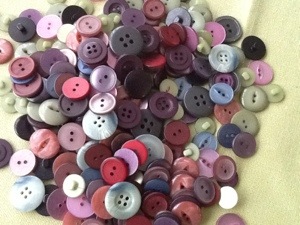
When we got back at the end of the day I dived through the two shoeboxes full of more modern buttons. I’ve chosen some to bring home and left the rest for someone else to use. They were unsold stock from my husband’s uncle and aunt’s secondhand store.

20121027-200448.jpg

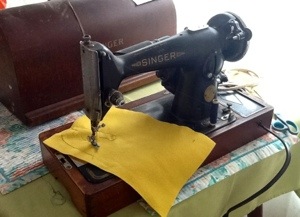
And the last part of playing with sewing stuff (rather than, you know, actually sewing), was dragging an old Singer out from under a dressing table. This was previously Nan’s sister’s machine which she used for years. When her Aunty Kath passed away, my husband’s mother insisted it be kept and it has been waiting for someone to bring it back to Tasmania. It is NOT light enough to be carry on luggage. All we knew previously was that it was a Singer in a curved wooden case. It turns out to be what Google images suggests is a 201k, and it still sews. The power plug is very cracked so we did not plug it in, but turned the hand wheel by hand, as you do. It needs a new power cord and plug, and a new spool pin. And a very good clean and oil.

20121027-180908.jpg

The Singer got tucked back under the dressing table to wait for someone to bring their car over on the ferry.

I might have also bought some fabric – knits from The Fabric Store’s knit sale and some suiting from Darn Cheap Fabric to make the black work jacket I seem to be missing from my wardrobe.

Finished object backlog – winter coats

Well, while I haven’t been blogging, I’ve certainly been sewing. Before the end of August I completed two coats – one for me, and another for my husband. Hobart weather is flaky through springtime so they are still getting worn.


Mine is from Patrones Joven #10 (early 2012) pattern #22

Back in March 2012 we visited Melbourne and as part of our swimming pool length of fabric bought several coat candidates. I wanted to practice coat techniques before diving into Robin’s more complex construction so I made this coat for me using Sherry’s wonderful RTW jacket tutorials. I’ve still been wearing it over the past fortnight thanks to our ‘lovely’ spring weather. The alterations to the pattern were about decreasing both bodice and sleeve length and the collar height.

I feel well dressed when I put this on, I didn’t have a nice coat last winter and I really missed it. I can see myself wearing this for years to come.

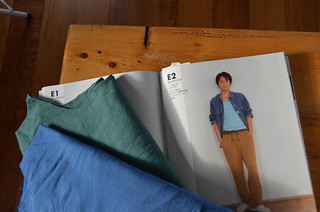
Robin’s coat was more complex due to the thicker, wool/poly blend flannel fabric (and the standards I set myself). It is from a Japanese Pattern book – A Book Of Men’s Coats by Ryuichiro Shimazaki, and apart from some extra width across the upper back and shorter sleeves, the pattern needed very little tweaking to suit.nI added a calico back stay, hair canvas pad stitched to the collar and front facings and shoulder pads and sleeve heads to the pattern to give the coat the structure the design and fabric needed.

Each coat got the same lining a stretch poly satin with lovely drape and slip. I’d ended up with leftovers from my coat. A trip to Spotlight didn’t reveal anything better (Robin dug through the copious piles of poly satin and other lining candidates), so we bought enough to cut lining for Robin’s coat too.

Buttons were sourced at Jimmy’s Buttons on the same day as the Melbourne Sewist’s meet up after LotsofButtons were out of stock of the one’s we’d selected. Buttonholes were done using my vintage Singer buttonholer with a keyhole shape template using topstitching thread. I did a sample buttonhole on a scrap and took that to Melbourne with me to make sure they would fit.

Top stitching was done on SuperNellie, my Elna Supermatic machine. It was lovely to have a second machine set up just for top stitching, no rethreading for just a moment’s work. Also her narrow presser foot, adjustable presser foot pressure, and narrow feed dogs made precision easier.

It’s been so satisfying to have tackled this project and I’m happy with the finish I achieved on them both.

Green Elnas

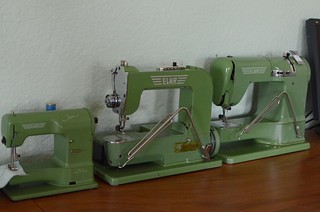
Meet the trio:

Green Elna Trio

SuperNellie, my Elna Supermatic, was previously introduced here

SuperNellie opened my eyes to the beauty and simplicity of vintage sewing machines. I fell in love with her clean lines, solid metal mechanical insides and growly tractor sound. I’ve oiled and cleaned her many times, and replaced a rubber friction wheel so she now purrs along cheerfully (the TV volume no longer needs to be cranked right up when she is running). She has been kitted out with some more decorative pattern cams and extra feet. She topstitched through thick woollen coating, and makes beautiful buttonholes.

Of course when we brought SuperNellie home and googled vintage Elnas, we quickly learnt about the Grasshopper, her predecessor.

And the search began.

I don’t know why, but there seem to be a bucketload of Elnas in New Zealand. So I signed up for a TradeMe account and kept my eye out. My Aunt Wendy and Cousin Celia live in Auckland, so when a Grasshopper came up local to them, and was looking like it would go for a reasonable price, I pounced! Much better value than the one listed repeatedly on Ebay Au for $700 that apparently doesn’t have a bobbin.

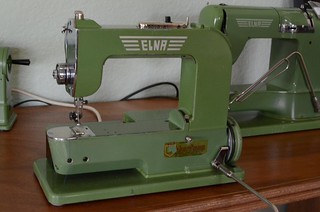
Elna Grasshopper
Grasshopper from 1951

After a journey across the Tasman sea (and the reverse journey for some KokoBlack Chocolate), Grasshopper took up residence on the workbench. She is only a straight stitch machine; it is beautifully even. I had to replace the drive belt and liberally apply oil in the 17 places indicated in the manual. A rub over with a damp microfibre cloth cleaned off what little grime there was on the exterior.

These two machines are both low shank, meaning their feet are interchangeable with my modern Elna. The different width of feed dogs does make a difference though, so the narrowest feet don’t work so well on the modern machine with its wide feed dog area. I purchased a box of vintage attachments, and have been putting them to good use. I’ll cover them in more detail in other post, as I’ve had a great deal of delight in making my sewing life easier with well thought out tools.

Based on the criteria of “green Elnas” the search continued, albeit at a slightly slower pace for the remaining part of the collection, an Elna Junior. TradeMe came up trumps again, this time from around Wellington from a seller willing to ship internationally.

Elna Junior
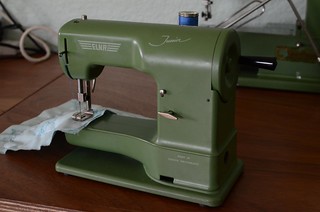
Junior, the toy machine Elna made during the fifties.

Isn’t she too cute??? No rust except on the old needle which I quickly replaced. Some oil has worked it’s wonders on freeing up movement, and she sews a chain stitch – meaning you don’t need a bobbin underneath. This is a hand cranked machine – the handle on the side moves the needle up and down. There’s also a music box built in which plays the Blue Danube waltz.

Tiniest niece Isabelle will be encouraged to learn to sew on Elna Junior, as it will be very tricky for her to sew her fingers to fabric thanks to the shape of the presser foot. The instruction book includes instructions for regular straight seams, and, get this, flat felled seams, quilting and draft it yourself doll clothes. Expectations of young girls in the fifties were very high!

All this playing with old machines also got me cleaning and oiling my modern machines more often. They are happier now too.

Kids clothes week challenge

Despite my one and only son being taller than me, I’m joining in on Kid’s Clothes Week Challenge, an initiative by Elsie Marley suggesting sewing an hour a day of sewing for your children. When I proposed the idea his eyes lit up.

In the queue:

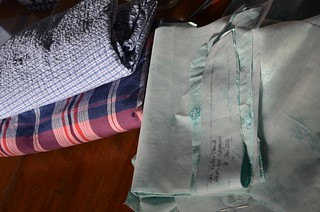
A final refinement of the Colette Negroni Shirt pattern using an old bedsheet.

Zac shirts

And then the two checks fabrics above. I can use the same thread colour for these, so it should be a quick production run approach. On Sunday night I sewed up the muslin and he tried it on for size on Monday night. The sleeves were still a little long for his liking. When I reduced sleeve length, the sleeve cap was too shallow for my liking so I will make the final tweaks to the pattern and have a big cutting out of shirts tonight.

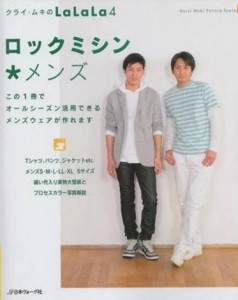
PJ pants using the pattern from BASIC of LOCKSTITCH SEWING MACHINE of MENS CLOTHES ebay link and comparisons to the hole ridden pair he won’t give up.

On Monday night I sewed up the PJ pants and they are done awaiting a photo.
PJ Pants

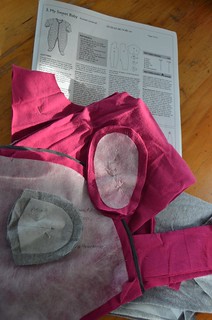
Tiniest Niece Isabelle will get some knit body suits and a cute cardigan. I’ve got a stockpile of preloved t-shirts to salvage fabric from. I’ll touch base with my sister in law about what is at the top of her ‘needed/ wanted’ list.
Ottobre - for the tiniest niece

My strategy:
Over the weekend, before the challenge started I cut out all the above. Recently Zac joined in on the sewing of a shirt, and we have made some more modifications to the pattern around sleeve width, collar stand height, and whatever you call the width of the collar in technical terms. Very practically he suggested a test garment before I attack the final two shirt pieces with scissors. I’m quietly delighted he’s interested in me making clothes for him, and has also shown an interest in doing some of it himself too.

Another part of the strategy will be to use the slow cooker and leftovers to free up my sense of space in the evenings.

Supplies I might need include press studs for Izzy’s garments, but I should have everything else I need in the Cupboard’o'PlentyTM