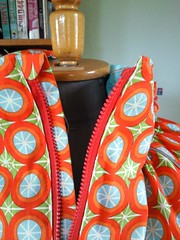
Over the weekend I made and inserted the lining and completed the zipper packets. Tuesday night I topstitched around the collar and down the front. I also pinned up the hem ready for pressing before sewing it in place.
I’m now nearly done. This morning before work I topstitched the hem into place.
This morning I woke up before even the cats thought it was a reasonable time to be awake. I call it ‘stupid o’clock’.
I caught up with my regular reading including sewing blogs and was tickled pink to see Tasia had highlighted my welt pocket addition to the Minoru [insert excited squeal here] I’ve been very proud of those pockets, now even more so. Although I would strongly recommend inserting them on the front pieces before you sew anything else. I did it after doing sleeve and side seams which meant a bit of faffing about getting the rest of the jacket out of the way while sewing. All credit to Sherry’s wonderful welt pocket tutorial at pattern-scissors-cloth.
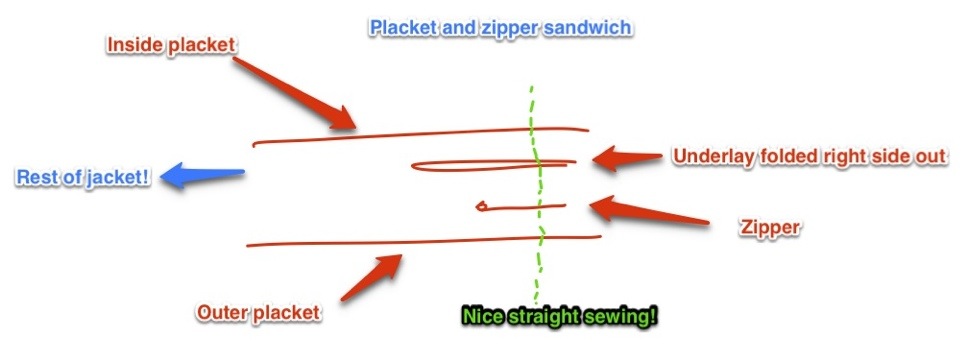
Another tweak I have done is add an underlay to the zipper in deference to my plans to potentially wear this while bike riding; if the rain is hitting my front, the non-waterproof zipper is a weak point. Finding a waterproof zipper or waterproofing one was off the cards. Adding the placket underlay would probably be overkill for a regular fabric jacket though.
I cut a fifth placket out of the main fabric, folded it in half and made a little rounded end to it for folding over the top of the zip. Blatantly copied from my son’s rain jackets again. It will also stop the zipper getting caught in clothing underneath which is something that seems to happen quite a bit to me. I’ve discovered it also makes a nice little tab of fabric to hold onto while pulling up the zipper to start with. To attach it, I sandwiched the zipper between the underlay and packets, having finished both ends of the underlay already. It should be roughly an inch longer than the placket to allow for the turnover.
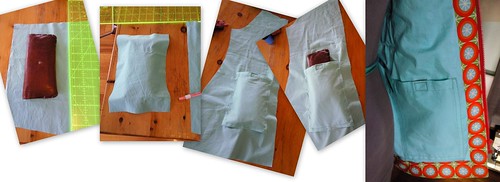
I also made one of the internal pockets longer so my wallet would fit in there. The key step here is putting your wallet on the fabric and drawing around it.
What’s left? The sleeves adaption I have planned.
This has been one of the beauties of Tasia’s pattern – it allows you to really make it your own if you want to. I’m thinking I’ll need one in a simple fleece for early morning gym trips… That’ll be a nice simple one.


Oh wow awesome effort-this why I don’t do jackets (what am I saying? I’ve had a jacket and its lining all cut up and ready to go sitting under the bed for the past year and a half..) it just looks like so much… Work. Thanks for your comments-I’ve put up a post on all my magazines sources on my blog. Will be doing another one soon on sources for Japanese pattern books. Best of luck with the jacket, it looks awesome from what you’ve got on your blog. Can’t wait for the full reveal in all its glory…
Sharon,
By all means – I’d be flattered if you were to pinch my ideas
I found the service from Nappies Covered to be perfect and prompt, postage was reasonable for express post for a relatively heavy packet. I did order some samples/ “Nappy cuts” of three fabrics first to check I liked the colours and feel of the fabric too. My plan is to turn the other two into drawstring bags for gym clothes. The colours on the website were a pretty good match between my monitor and real life too which was reassuring. If you’d like a feel of the coated fabric, email me {pr.kirsty at gmail dot com} and I’ll pop a scrap into an envelope.
You are powering along, and “stupid o’clock” in our household is when the dog opens his eyes and doesn’t move
I am really appreciating all your changes to your jacekt and hope you don’t mind if I borrow them, if not for this version (ripstop) but the next one. Also how did you find your fabric source, they have some very tempting fabrics.