Kids Clothing Week Challenge

Life got in the way. It probably wasn’t wise to attempt KCWC when I knew there was a side of pork arriving mid-week, and the rest of life still to be dealt with. Anyhoo, I finally have four of those garments done.

First Up in the Four Finished Objects: 2 bodysuits for the tiniest niece who is now 3 months old. I did check these would still fit. All I had to do was add the press-snaps.

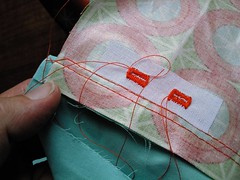
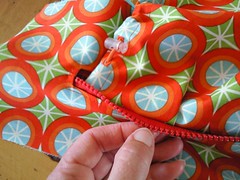
I bought some snap pliers and boy they make a difference. Next time I will make the binding strip wider as the snaps are a bit too wide and bite into the body fabric making a weak point. These were made out of assorted recycled tshirt cast offs from family members.

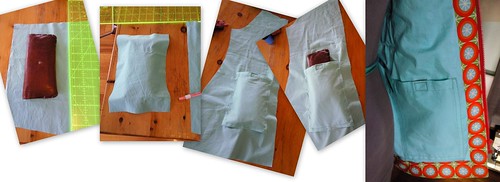
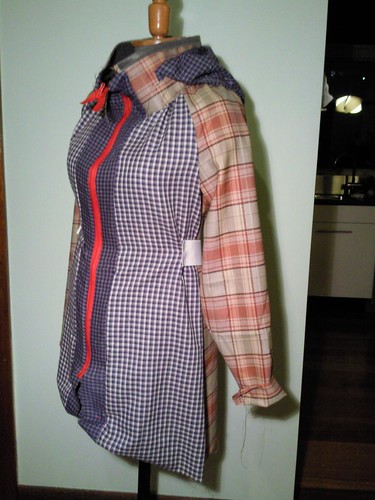
And garments 3 and 4 were for my son. A couple of shirts. Perfect now the weather is warming up???? Only loosely based now on the Colette Negroni shirt, shoulders widened, arms shortened and narrowed especially from biceps to wrists, nipped in at the waist, collar converted to stand+collar.

I’m particularly pleased with the buttons and buttonholes. I’ve reduced the width of the buttonholes, making for a more polished finish. Also buying a button-sewing-on-foot was a revelation. It is like magic. My little trick is to use the wash-a-way wonder tape to stick the buttons in place while you sew. Why didn’t anyone tell me?

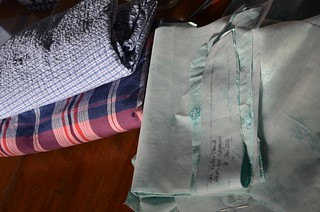
Finally some awesome use of plaid/check (which is it?) on the back shoulder yoke.

I’m glad these garments are no longer part of my to-do list.

Kids clothes week challenge

Despite my one and only son being taller than me, I’m joining in on Kid’s Clothes Week Challenge, an initiative by Elsie Marley suggesting sewing an hour a day of sewing for your children. When I proposed the idea his eyes lit up.

In the queue:

A final refinement of the Colette Negroni Shirt pattern using an old bedsheet.

Zac shirts

And then the two checks fabrics above. I can use the same thread colour for these, so it should be a quick production run approach. On Sunday night I sewed up the muslin and he tried it on for size on Monday night. The sleeves were still a little long for his liking. When I reduced sleeve length, the sleeve cap was too shallow for my liking so I will make the final tweaks to the pattern and have a big cutting out of shirts tonight.

PJ pants using the pattern from BASIC of LOCKSTITCH SEWING MACHINE of MENS CLOTHES ebay link and comparisons to the hole ridden pair he won’t give up.

On Monday night I sewed up the PJ pants and they are done awaiting a photo.
PJ Pants

Tiniest Niece Isabelle will get some knit body suits and a cute cardigan. I’ve got a stockpile of preloved t-shirts to salvage fabric from. I’ll touch base with my sister in law about what is at the top of her ‘needed/ wanted’ list.
Ottobre - for the tiniest niece

My strategy:
Over the weekend, before the challenge started I cut out all the above. Recently Zac joined in on the sewing of a shirt, and we have made some more modifications to the pattern around sleeve width, collar stand height, and whatever you call the width of the collar in technical terms. Very practically he suggested a test garment before I attack the final two shirt pieces with scissors. I’m quietly delighted he’s interested in me making clothes for him, and has also shown an interest in doing some of it himself too.

Another part of the strategy will be to use the slow cooker and leftovers to free up my sense of space in the evenings.

Supplies I might need include press studs for Izzy’s garments, but I should have everything else I need in the Cupboard’o'PlentyTM

Minoru: Nearly done

Over the weekend I made and inserted the lining and completed the zipper packets. Tuesday night I topstitched around the collar and down the front. I also pinned up the hem ready for pressing before sewing it in place.

I’m now nearly done. This morning before work I topstitched the hem into place.

This morning I woke up before even the cats thought it was a reasonable time to be awake. I call it ‘stupid o’clock’.

I caught up with my regular reading including sewing blogs and was tickled pink to see Tasia had highlighted my welt pocket addition to the Minoru [insert excited squeal here] I’ve been very proud of those pockets, now even more so. Although I would strongly recommend inserting them on the front pieces before you sew anything else. I did it after doing sleeve and side seams which meant a bit of faffing about getting the rest of the jacket out of the way while sewing. All credit to Sherry’s wonderful welt pocket tutorial at pattern-scissors-cloth.

Another tweak I have done is add an underlay to the zipper in deference to my plans to potentially wear this while bike riding; if the rain is hitting my front, the non-waterproof zipper is a weak point. Finding a waterproof zipper or waterproofing one was off the cards. Adding the placket underlay would probably be overkill for a regular fabric jacket though.

Zip underlay

I cut a fifth placket out of the main fabric, folded it in half and made a little rounded end to it for folding over the top of the zip. Blatantly copied from my son’s rain jackets again. It will also stop the zipper getting caught in clothing underneath which is something that seems to happen quite a bit to me. I’ve discovered it also makes a nice little tab of fabric to hold onto while pulling up the zipper to start with. To attach it, I sandwiched the zipper between the underlay and packets, having finished both ends of the underlay already. It should be roughly an inch longer than the placket to allow for the turnover.

My first attempt at a useful sewing diagram

I also made one of the internal pockets longer so my wallet would fit in there. The key step here is putting your wallet on the fabric and drawing around it.

Internal Wallet Pocket

click for larger original


What’s left? The sleeves adaption I have planned.

This has been one of the beauties of Tasia’s pattern – it allows you to really make it your own if you want to. I’m thinking I’ll need one in a simple fleece for early morning gym trips… That’ll be a nice simple one.

Hoodwinked

When I sewed together my muslin I sewed the bottom edge of the hood to the sewing line marked for the zip. This meant it was too tall. However it was probably the right size in the beginning, because according to the hood/collar instructions (which I read only this morning, ahem!), it is meant to be attached at the bottom edge of the collar. In my research (staring intently at other jackets in the house), hoods seem to be attached just below the zipper line. Also Rachel had written about a bit of water creeping in via the hood/collar area due to a ‘lip’ when the zip is open.

Anyhow… Changes I wanted to make were doing a lining and adding a drawstring.

When in doubt, make a plan – figuring out order of steps.
Hood Changes

I added an elastic drawstring with little tension clips for horrid weather.Detail of making the drawstring holes.
Hood Changes

Upclose of the mini buttonholes – about 6mm/ 1/4 inch long. I added a small bit of interfacing on the wrong side to be safe.
Hood Changes

Attaching the hood near the zip. I basted the bottom edge of the hood to the bottom edge of the zipper, then attached the zipper to the collar.

Hood Changes

Pleats – to accommodate the width of the hood inside the zip I added two small pleats either side of the front edge which I think look quite nice.

Hood Changes

Testing the hood for size.

Hood Changes

You know, it probably would have been easier to read the instructions when I was putting together the muslin, but I am happy with the end result, and happier with the way the hood is attached inside than the original. If I was a perfectionist I would sew some binding over the overlocked edge of the hood. I can always add that later.

The Mishmash Minoru Muslin

Erm, so I’m not planning on making this a ‘wearable muslin’ going by the mishmash of fabric I gathered together. It’s just being described as neo-punk by my husband. I think he’s too polite.

Minoru Muslin

Collar -  I interfaced the inside of the collar to simulate the body of the waterproof fabric I will be using and got the comment that it didn’t have to meet Antarctic conditions. 3cm off height, to be taken off top edge, leave hood attachment placement line the same. This way it will not bump my ears!

Waist elastic – 5cm higher for placement line.

Use original pattern length for body pieces but use 5cm hem allowance. Not that I’ve referred back to the pattern yet – this might be the allowance!

Sleeves need to be shortened. Turning them up 5cm without the cuffs will work fine. I am replacing the elastic with a fold and button/ buttonloop arrangement as this give better comfort for me both open and closed.

Shoulders and side seams should be cut a size up (or seam allowances sewn at 10mm rather than 15mm. Just to give a bit more ease for bike riding.

Hood – a slice off along the centre seam of about 7cm at the front edge tapering to nothing by the double notch at the back of the hood. I will also add a drawstring with some cord elastic and a couple of those things that clip onto the cord. Doohickeys, I think they are called.

Under consideration – an underlay for the zip so that it is a bit more water-resistant? This is an idea from looking at other jackets. I’m not aiming for a full bushwalking-in-torrential-rain-waterproofing, but centre front could be a potential hot spot (wet spot? ew!) for leakage when cycling into the rain. I might also pick up a 80cm long zip and try that too as the 70cm is not long enough. A separating zip with two pulls would be most excellent.

I have not yet decided on pockets and placements. I would like external pockets but not sure on whether patch or welt would be better and most useful.

Ok I’m ready to cut out my lovely fabric tomorrow night. For some reason I’ve felt quite nervous about cutting into it. I think it is because I had to order it online rather than knowing I can duck into town and pick up an extra metre if I mess something up majorly. I’ve certainly sewn with more expensive fabric recently (nice Italian men’s shirting anyone?). Also needing to get it right the first time to minimise resewing seams and affecting the waterproofness is an extra layer to the construction process. I’ll be experimenting a little and using seam sealing tape for the first time. I might practice on a drawstring bag for the gym first…

Prepping for the Minoru Sewalong

20120111-212123.jpg

I traced out all the pattern pieces (giving me the option of making another size later if need be) and laid them out to get a sense of the fabric required. At 115cm wide fabric 4 1/4 yards (3.8 metres) seemed an awful lot and the provided cutting layout looked generous. And I’m going to have to shorten sleeves a bit too. The fabric I have chosen is only 106cm wide. Yet my layout gives me a ‘fabric required’ of only 2.8 metres at a size 10. The only piece shown as upside down is the hood, so with an extra 20cm I’ll have enough to turn it up the right way. The pattern repeat of circles is 4.5 cm so shouldn’t be too tough to match. I also have the large sample piece I ordered for smaller things like pockets.

20120111-212233.jpg

I ordered 3 metres of this lovely creature. It is a waterproof PUL coated on the inside cotton print from Nappies Covered and has a lovely drape for a coated fabric. I had ordered three samples, aka ‘nappy cuts’ to see what the fabric felt like, and to check colours. Well worth the money to know what it was like and how gorgeous and intense the colours are. Of the three, this was the clear stand-out. I did a mock gather by squishing the fabric onto sticky tape on the wrong side and it looks OK. So it should work around the neck and waist gathers.

I also spent some time studying my son’s collection of waterproof jackets that he has bought for sailing and walking. The inside of the collar of all of them is cut out of micro/polar fleece fabric which is nice and snuggly around the neck. So I am stealing this design idea. Another design idea was to use the seam sealing tape to coat the outside of zips for pockets on the front. I am not sure about this yet – I might go for a welt pocket with a zip inside that will probably stay open most of the time. Pockets were lined in polar fleece too. The expensive jackets have so many details and features.

20120111-212537.jpg

After reading Rachel’s notes about how her Minoru performed in Melbourne rain, I had a close look at the way the hoods were attached. Seam sealing tape again appears to be the answer, coating the seam between the zip and the lining. I’m going to experiment with this and post as part of my Sewalong updates.