Kids clothes week challenge

Despite my one and only son being taller than me, I’m joining in on Kid’s Clothes Week Challenge, an initiative by Elsie Marley suggesting sewing an hour a day of sewing for your children. When I proposed the idea his eyes lit up.

In the queue:

A final refinement of the Colette Negroni Shirt pattern using an old bedsheet.

Zac shirts

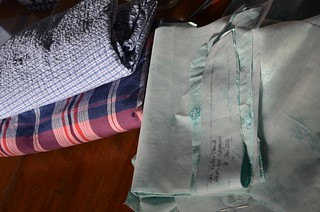
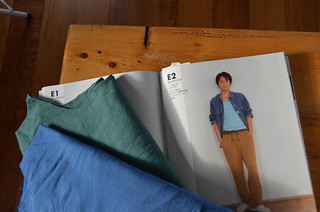
And then the two checks fabrics above. I can use the same thread colour for these, so it should be a quick production run approach. On Sunday night I sewed up the muslin and he tried it on for size on Monday night. The sleeves were still a little long for his liking. When I reduced sleeve length, the sleeve cap was too shallow for my liking so I will make the final tweaks to the pattern and have a big cutting out of shirts tonight.

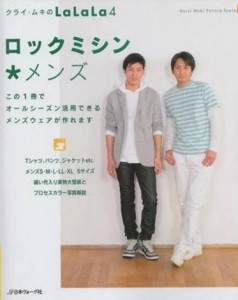
PJ pants using the pattern from BASIC of LOCKSTITCH SEWING MACHINE of MENS CLOTHES ebay link and comparisons to the hole ridden pair he won’t give up.

On Monday night I sewed up the PJ pants and they are done awaiting a photo.
PJ Pants

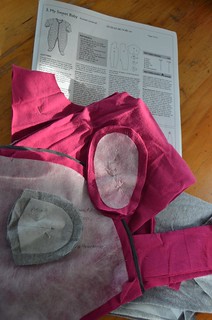
Tiniest Niece Isabelle will get some knit body suits and a cute cardigan. I’ve got a stockpile of preloved t-shirts to salvage fabric from. I’ll touch base with my sister in law about what is at the top of her ‘needed/ wanted’ list.
Ottobre - for the tiniest niece

My strategy:
Over the weekend, before the challenge started I cut out all the above. Recently Zac joined in on the sewing of a shirt, and we have made some more modifications to the pattern around sleeve width, collar stand height, and whatever you call the width of the collar in technical terms. Very practically he suggested a test garment before I attack the final two shirt pieces with scissors. I’m quietly delighted he’s interested in me making clothes for him, and has also shown an interest in doing some of it himself too.

Another part of the strategy will be to use the slow cooker and leftovers to free up my sense of space in the evenings.

Supplies I might need include press studs for Izzy’s garments, but I should have everything else I need in the Cupboard’o'PlentyTM

Decluttering and a Short History of Zac Designs

The clothing care and size label giveaway was a feeble attempt to reduce the contents of a bursting cupboard.

But why did I have them in the first place?
Swing Tag logo

Years ago (so many in fact that the small children pictured below are finished school) I had a market stall where I sold baby and toddler hats and clothes I’d sewn. This was in the days before the burgeoning ‘babies’ markets full of cute pinafores. I’d found it tricky to find decent boys clothes that were interesting, and also thanks to an inspirational outfit with hat from a dear friend bought in Germany and a subsequent trip to Europe ourselves six months later, I knew it was possible to find nicely designed clothes, just not locally. Another element to that was living on student allowances which covered rent and lentils but certainly not the upper end of nice kids clothes. Looking around, there’s still way more nice clothes for girls than boys.

Thus Zac Designs was born.
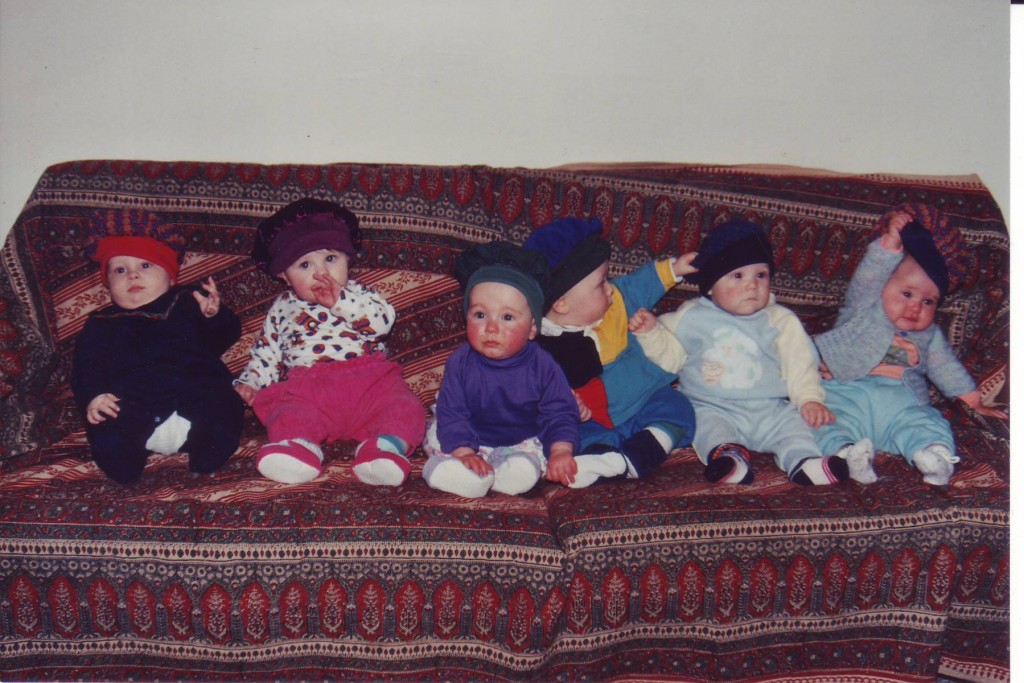
Babies from Mother’s group all lined up with hats on, albeit temporarily.

Starting out with baby hats, we enjoyed early success in a Hobart winter which made hats essential. I quickly expanded the line to include clothes like trousers, overalls, jumpers, dresses and long sleeved tshirts, all made from good quality fabric and including room for growth with extra buttons, elastic and adjustable straps. Does anyone else remember the Top Kids (ebay link) magazines? Ottobre Design would be an equivalent now and I eagerly awaited the new issues. I also pored over Studio Bambini magazines for inspiration.
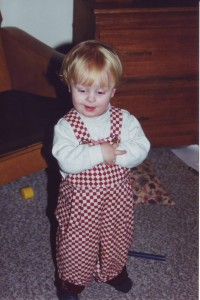
Overalls on our chief model, Zac

Each Saturday we would set up our stall at Salamanca Market, thanks to transport from my parents as we did not have our own car at that stage. We quickly learnt that a cool but sunny day was optimal for sales, Easter was better than Christmas, and that while some patterns and fabrics caught people’s eyes they weren’t necessarily the best sellers. Some hats and clothes languished on the stall for weeks at a time, while others would disappear as soon as I could make them. I learnt to only make a small number up in a new fabric to see how it sold first. I was very excited a month or so ago when I found I still had the pattern for “French Style Cardigans” under the house. Surprisingly similar to a red merino one I made for me this winter!

Each week we’d wait to see what we sold – the first dollars were put aside for fabric, then the next portion for basic veggies, then fruit, then bread and cheese and finally local wine. We’d make our sales then send one of us off with Zac in a backpack to gather food supplies from the other stallholders. In our last summer we were perilously close to the Elsewhere vineyard stall. Some days we’d sit there behind the stall enjoying a nice Chardonnay or Pinot Noir as the market moved past lunchtime.
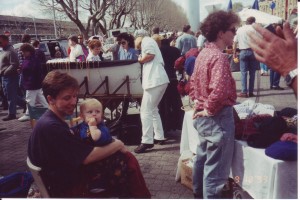
Back of the market stall.

A graphic design student designed us a rubber stamp to make our own swing tags, and I had woven labels made to sew onto the clothes. Quilting fabrics were a good source of interesting prints and I also bought some basics like cotton drill and fleecy (to line trousers and jackets) in the smallest wholesale quantities I could. I set up a sewing table in our wide hallway of the flat and sewed in the evenings or during the day if Zac slept.

Mother’s Group baby

This time taught me a lot about production line techniques through trial and error, customer service and sales, and managing being self employed with a young baby. It also made me realise that I wanted to try work outside the home – not knowing how much we’d earn each week was tricky to manage for cash flow as any small business operator will tell you. But we earnt enough to help get us to Europe for 3-4 weeks on a student budget (babies got you a room to yourself in youth hostels back then!) and then enough to buy my own sewing machine and an overlocker. Mum’s Elna Lotus sewing machine really did a lot of work for Zac Designs. Poor thing. It is still going strong, and one day I’d like one of my own to add to the Elna retirement home I seem to be establishing.
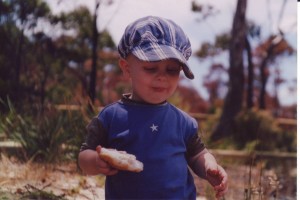
Summer Hat

I’ve had a ball looking back through boxes of photos to find the images for this post. Occasionally I see a ZacHat with one of myfabrics out and about and want to mug the poor parents to say “I made that” and when people see something I’ve sewn and say ‘you could make these for money’ I simply reply, ‘been there, done that, I’d rather sew for fun not full-time’. And, it’s still a time I look back on with great fondness.

My BA Graduation and Zac’s Inspirational Outfit (PS I made that purple jacket too!)
Small People Clothing Label Giveaway

Clothing Labels

Does anyone out there have a genuine use for these? Or know someone who makes small people clothes for market stalls etc?

They are a remnant from my long-past small business and I’d like to see them put to use rather than loitering in my cupboard.

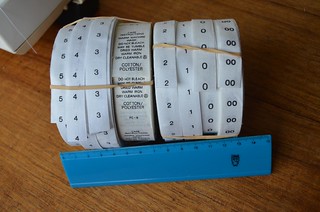
The labels are sew in, and on rolls. You cut off the labels one by one. I used to snip the ‘polyester’ line off the care labels where appropriate and use a marker to add in other materials (eg rayon, wool) or cross out if some lines didn’t apply. Seriously though, all clothing of this size should be machine washable and tumble-dry-able.

Leave a comment below by midnight Friday 31st August and I’ll randomly draw a winner if there’s more than one person interested. I will post worldwide.

Melbourne Sewers Meetup

On the weekend I joined a lovely group of Melbourne sewers. I finally got to put voices to blog names and faces. Kudos to Rachel of Boodog for organising us, and look who came:

Kat  All the whimsical things http://sewingwithpatience.blogspot.com.au/
Robyn: Sew love red  http://sewredrobyn.blogspot.com.au/
Rachel: Boo dog and me http://boodogg.blogspot.com.au/
Rachel: My messings http://mymessings.blogspot.com.au/
Kirsty (Me!): Rocket Sews http://rocketsews.otheredge.com.au/
Leith: Sew Brunswick http://sewbrunswick.blogspot.com.au/
Lara: Thornberry thornberry.wordpress.com/
Melanie: PoppyKettle http://poppykettle.blogspot.com.au/
Helen: Funkbunnys kitchen garden http://funkbunnysgarden.blogspot.com.au/
Christy Little Betty http://littlebettydesigns.blogspot.com.au/
Rachel: The two windmills http://thetwowindmills.wordpress.com/
Sarah: Sewsquirrel http://www.sewsquirrel.com.au/
TJ: The Perfect Nose http://theperfectnose.wordpress.com/
Belle: Bella’s Collectanea of Sewing http://www.bellacollectanea.com

Fabulous ladies who are blog-less.
Anna
Catherine
Heather
Sue A

Kat of All the Whimsical Things collated this list from the side of a Tessuti carrier bag. How appropriate!

I didn’t take a camera so I’ve borrowed these photos from TJ and  Kat

IMG_3976

L – R – Robyn (background), Melanie, Me, TJ

While it felt extravagant to visit Melbourne for a day, meeting everyone was like a breath of fresh air. There was much inspection of each others’ garments, fondling of fabric, and general sewing talk. It was like meeting old friends.

In the morning I went in search of buttons for the woolen jacket/coat I am making for Robin and found them at Jimmy’s Buttons in Fitzroy. While I was in the area I dropped by The Fabric Store armed with a printed ‘inspiration board’ from my son for shirt fabric. I did a once around the shop coming up with nothing much so showed the printout to one of the assistants who laid her hands on 4 options within moments. I’m glad to report he likes the two I brought home and is keen to get involved in making them. He’s already done some work both on the sewing machine and overlocker so knows the basics.

The next morning I was up at 5.30am working on the pad stitching of hair canvas to the collar. Inspiration is a great thing!

I’ll be back in late October – pencil in October 25-27th for a repeat!

Pattern Pyramid Giveaway Winner!

And the winner is Marie from GMarieSews. Check out the humungous knitted quilt wrap she has just posted. Such persistence and fabulous colours! I wonder which pattern Marie will choose.

Marie, I’ll be in contact for your postal details and I can’t wait to see where the parcel goes after that!

We rather jokingly put the bowl’o'names in front of Milly, aka Participation Cat, and joked she could choose one as she is a keen sewing helper. Given that she’s such a food scrounger she promptly put her paw out and snared Marie’s name. It had to be rescued before it got too chewed. I had to run for the camera.

A forest of elnas

Reminder: The Pattern Pyramid giveaway here closes this Thursday night. Add a comment for your chance to join the fun and the stalkers.

A few weekends ago we stopped by the Evandale Market on a Sunday morning as we travelled back home from the north of the state. We were travelling with a friend, and at one point my husband Robin wandered off and then was back telling me about an old green Elna sewing machine in a case. The three of us made a beeline over to the stall to find an old Elna Supermatic in amongst antiquey stuff and tools.

I turned the flywheel a bit and it gradually loosened up. I also toyed with the idea of taking it inside the hall and seeing if I could plug it in and see if the motor worked. It looked clean inside the bits I could open. I faffed about, umming and ahhing and generally over thinking it, until my dear sewing enabler friend Jenny pointed out that the guy was asking the price of a nice bottle of wine and I wouldn’t think twice about that. So wise!

Supernellie

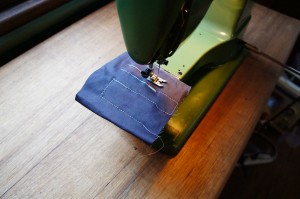
We lugged it back to the car and then drove the 2.5 hours home. About halfway I said, ‘it didn’t have a foot pedal!’ but resisted stopping at the side of the highway to double check. I thought that was a shame but perhaps I could find one. When we got home we opened up the case and set it up on the dining table. The weird metal lever on the front revealed itself to be a knee control – first one I’d ever seen or used. I plugged it in and turned it on. Apart from sounding like a tractor it ran ok, the light even worked. I then unplugged it, opened it up and oiled all the important moving parts.

Gradually it ran more freely, you could hear the oil doing it good. It became a slightly quieter tractor.

It is a solid zigzag machine, that can also have decorative stitch cams inserted. There were no accessories at all with the machine, just one lone bobbin and the zig zag cam. Being an Elna, I tested the feet from my modern machine, and they are all interchangeable! Note to self: do not do stitch samples on stretchy drill material. It took me a while to figure out what was happening.

You see, a large part of the attraction was that I learnt to sew on an Elna Lotus SP, my mum’s machine, which she still uses. It was easy to use, precise and worked everytime you needed it. When I went shopping for my own machine in the early nineties, I gravitated towards an Elna then too. My modern Elna has been a very reliable machine which has done a lot of sewing.

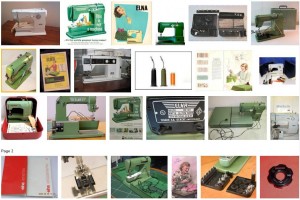
Confession time: after bringing home the Supermatic I spent some time on Google and discovered a whole ‘nother world out there. Aren’t they pretty in a post-war mechanical pseudo industrial way?


And the most useful find? The Yahoo Elna Heirloom Sewing Machine group. A wealth of information and sharing. I was able to diagnose the tractor sound effect, remove, clean and replace the bobbin mechanism, learn how to disengage the main motor to wind bobbins, and more from this helpful group of people. Beautiful!

A gentle word of warning. Don’t google Elna and look at the pictures of an earlier model – the No#1 aka Grasshopper. Because you might just find one for sale at the price of two reasonable bottles of wine. Oh dear. You can be sure I’ll let you know when it arrives.

Pattern Pyramid Giveaway lands in Tasmania!

I squealed out loud when I heard I’d won a Pattern Pyramid giveaway round hosted by Jennifer at The Musings of a Dedicated Housefiancee! And today the parcel arrived daintily wrapped with pink ribbon. Originally I’d eyed up the KwikSew dress, but further examination of the Women’s Weekly pattern meant I changed my mind. I fell in love with the pocket flaps and figure I can grade it up a bit with my slopers.

Check out the patterns:

  • McCalls 2085 is a shift dress and jacket
  • KwikSew 3380 is a dress with two waist options – dropped and regular
  • Simplicity 5931 is a vest, shirt and skirt pattern.
  • I’m also tossing in a bonus Burda Easy Autumn/Winter 2011. Check out this assortment of photos from the mag.

Fancy a shot at winning the three remaining patterns, an extra Burda Easy and some of the special labels?

Leave a comment below by 9pm AEST Thursday 16th August, making sure I can find your email address pretty easily :-)

  • Anyone, anywhere with postal service can enter the giveaway by posting a comment below  BUT you must have an active blog. (Reasons to become obvious.)
  • I will randomly select a winner.
  • I will post the remaining three patterns & magazine to the winner, along with a generous number of hand woven labels to be sewn into anything made from one of these patterns.

Original rules as decreed by Karen of  didyoumakethat?, the origin of the Pattern Pyramid.

The winner will pick a pattern to keep for themselves, then host their own giveaway. They will randomly select a winner, post the remaining patterns to that Person C. Person C will pick a pattern for themselves, host their own giveaway and post the remaining patterns to the winner, Person D. Person D will…

and hey, if you’re at the Aussie Sewer’s Meetup in Melbourne on the following Saturday I’ll deliver in person!

Waiting for photos

I finished several projects last week:

  • Grey Coat from Patrones Joven #10
  • Navy elephant Cambie dress
  • Red machine knit jumper for Zac

and a new-to-me machine came to live in our house.

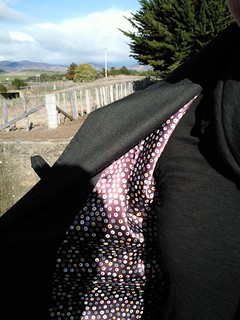
Here’s a coat lining shot for TJ

Coat Lining

But I need photos of the rest. Because it is not a good idea to take photos of the new overcoat and dress AFTER tasting about 20 wines at the annual Tasmanian Pinot Noir Showcase. Well, not if you want to share the photos …


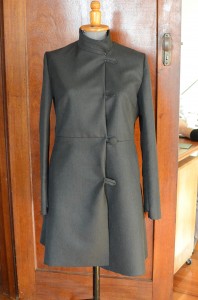
WIP: Grey Coat

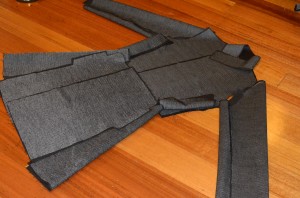
Still a way to go before it is finished. Over the last week my coat (number 22) from Patrones Extra  #10 has moved from this:

to this:

* all seam allowances pinned under roughly at the front. The waistline seam lines up in real life. Note to self – take note of these things *before* taking the photo.

I bought the magazine in Melbourne back in March this year and knew that I wanted to make this coat, it’s taken a while to get started.

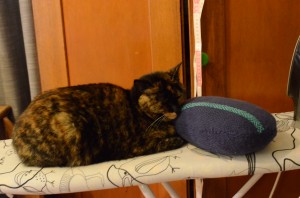
Participation Cat likes the ironing board, and was using the tailors ham as a pillow for her nap. They were warm after some pressing work.

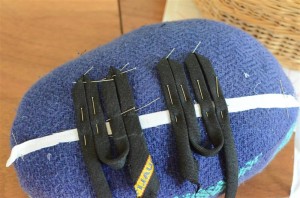
But I did get to use it later to pin out the button loops.

Tonight I have been working on the sleeve heads. Next up: Shoulder pads, facings and then cutting the lining.

Alterations for short stuff – 3.5cm off bodice length, 3 cm off the total collar height. I didn’t muslin the whole coat,  just the bodice so had to re-do the waist line on the real garment.

Posted in WIP

DIY Colour Cards

Melanie of Poppykettle’s post about having her ‘colours done’ reminded me I’d never posted about one of my DIY hacks. Back in the 80′s, yes, our house had a copy of Colour Me Beautiful and Mum, my sister and I all figured out what we were. I remember being a bit narked I came out as a ‘Spring’ as the pastels weren’t really what I felt like wearing as a teenager – too pretty and girly. Over the years I’ve worn a lot of white shirts, blue, ever so much blue and grey, red and probably too much black. Lately I’ve become conscious of injecting more colour into my wardrobe, adding orange and greens. Several years back I even had a New Year’s Resolution to “wear more pink” which I successfully achieved with a pale pink linen shirt that I wore until it was past threadbare and just dissolved. Far more successful than the year it was “wear more bracelets”. I just have my favourite jewellery, Ok?

Me-Made-May was a bit of a wakeup call though. There’s a lot of grey I wear, and so one change brought about by taking a photo everyday was that I started deliberately wearing scarves for colour and tried to mix it up a bit.

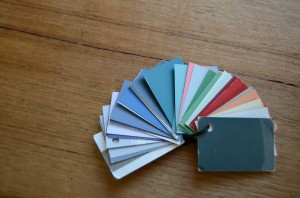
Back in November last year I was envious of Mum’s colour swatches she carries about with her. So having an idea of colours I think suit me, I set about making my own. I’m not very good at taking advice of others when I think I can muddle through. Hearing Melanie’s description of discovering new colours has piqued my interest however …

Here’s how I approached it.

Stage 1: Sourcing Supplies

  1. Go to your local hardware store. Not your paint store – they might actually offer to help you.
  2. Gather lots of colour chips. You want the ones on card, not the booklets on flimsy paper with tiny swatches.
  3. Look through your collection surreptitiously and realise you have too many of ‘x’ colour (for me it was blue, duh!).
  4. Force yourself to choose some colours that go well with blue – close colours, logical combos, wildy contrasting and everything inbetween. Choose a couple of ‘trendy’ colours to see if they work for you in Stage 2.
  5. Be sure to grab a handful of whites, offwhites and creams. Do the same for greys/browns or your preferred neutral.
  6. Saunter off towards the power tool section, then make a break for the exit.

Stage 2 – Go home and play with your colours

  1. Grab beverage of choice, and work during daylight hours if at all possible.
  2. You can cut the chips up now to make it easier to arrange things. And open a bag of chips to go with the drink if needed.
  3. Arrange them into outfit groups, or groups you think would look nice together in a print. Also group them into variations on a theme.
  1. Check them against your favourite clothes that you know flatter you. Grab that favourite white/off-white/cream top and find your closest match. Mark that one with a big star on the back so you don’t mix it up later. Ask me how I know.
  2. Put all the ‘what was I thinking’ colours off to the side. It’s strange how obvious they are all laid out together.
  3. Surf the internet looking for colour combinations for inspirations. Remember what you were meant to be doing. Come back and make a few more ‘outfit’ combo groups.
  4. Grab some of those colours back out of the reject pile to aid step 6.
  5. When you’re happy …

Stage 3: Make your Colour wheel

  1. Decide on a size for your swatches. Bigger is better, but you’ll be restricted somewhat by the size of your smallest swatch. Cut all your chosen chips to a consistent size. A ruler and stanley knife helps here.
  2. Punch a hole in the same corner of all pieces. Keep the coloured dots. You’ll see why.
  3. Organise your pieces in some sort of order.
  4. Tie a piece of ribbon through the hole or find a metal ring that will fit.

Ta da! Remember you can always duck into the hardware store the following weekend when you realise you need a nice brick red or turquoise to add to the mix.

Bonus points if you have access to a laminator. Grab all those dots. Tuck them inside a laminating pouch and zap them. Trim to credit card size and tuck in your wallet. If you put it over a fabric and it kind of melds in and looks happy you should buy the fabric. It’s the rule. And you’ll never be without your colours. Unless you give it to your mother before she goes to Japan – but that’s another blog post.

Posted in diy